Numerous Times
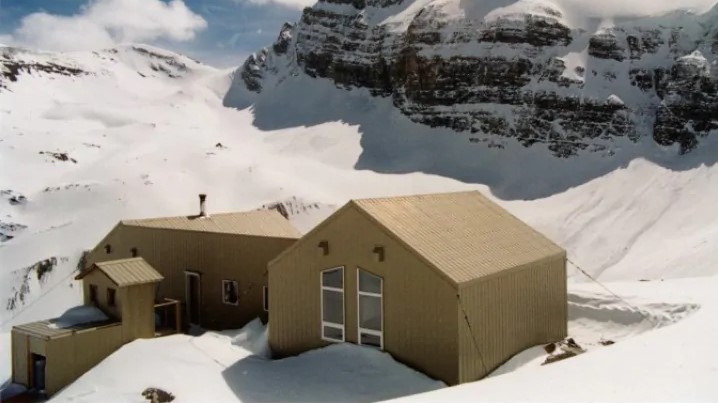
Bow Hut is the quintessential backcountry ski. Everyone has done it at least once, and usually more. I’ve done it so many times I’ve lost count. Why do I go so often? It’s a beautiful, easy ski tour that takes you to the base of the Wapta Ice Field. The hut is huge and heated (a rarity on the Wapta), and it’s a great jumping off point for many mountains in the area.
Even if you don’t stay at the hut, it’s a fantastic ski tour. The first time I went was on my first wedding anniversary in early December. We skied up with our light touring gear, stopped at the hut for a bit, and then skied back down. We were spending the night at Num-Ti-Jah Lodge where we got married. The inn keeper was a friend, and as night began to deepen, he put on the big outdoor light to guide us back across the lake.
A note to hikers/snowshoers. This is a SKI route. Please do not posthole the ski trail. You are causing major damage to the trail, and putting skiers in danger. Please be self-sufficient and break your own snowshoe/hiker trail.
Avalanche Danger
While many people take the trip to Bow Hut lightly, there are several avalanche risks. The trail is in a canyon with an overhead environment, which is especially dangerous during the spring melt. The AST 1 Manual uses an avalanche in this canyon as part of their training.

There are also hanging glaciers above the trail at the base of the final headwall. We skied the debris field from a collapsed glacier in 2017. It was staggering in its breath and length, filling the entire basin.

Finally, there have been skier triggered avalanches on the headwall itself. When I examined some of these reports, it seems the skiers were off course a bit, but still, the headwall can be avalanche prone.
Gear
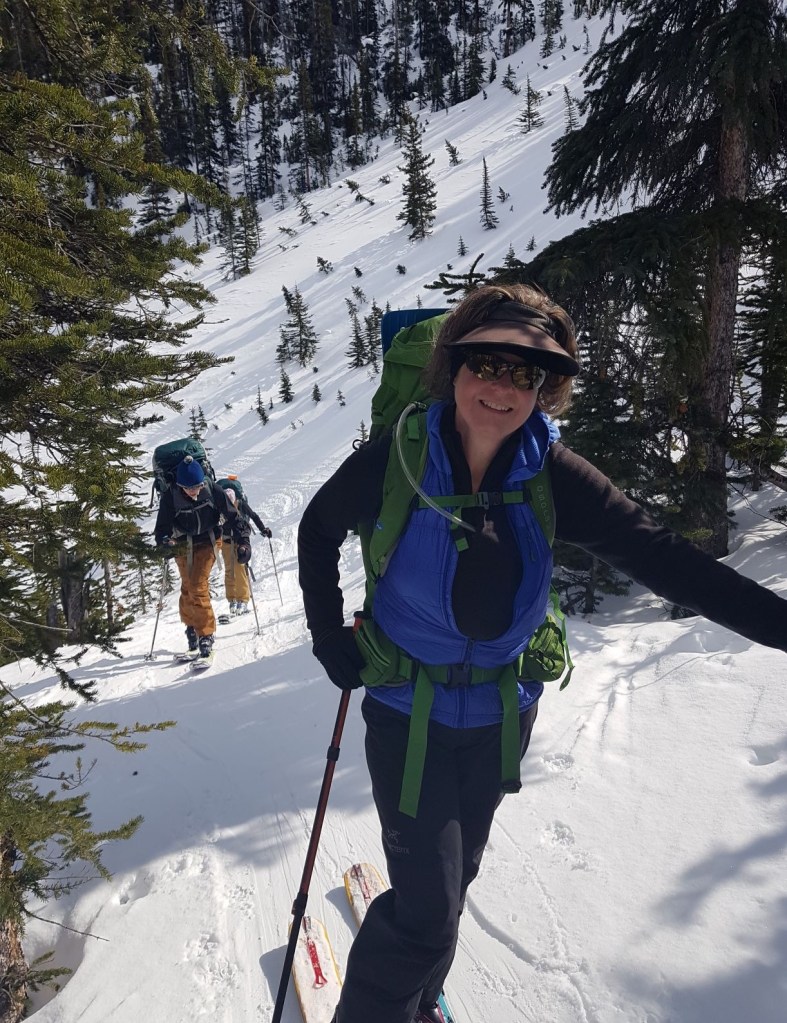
Full backcountry ski gear, plus all avalanche equipment like transceiver, probe and shovel. Quality training in AST 1 as a minimum. If you are going onto the glacier, you need a crevasse rescue course, rope, harness, and all associated gear.
Overview
From the parking lot, head towards Bow Lake. After crossing the lake, enter the trees. Head up this slope, and across to the top of the moraine. Ski down, and head towards the canyon (which is not the summer route). Near the end of the canyon, climb the obvious switchback to gain the ridge on climbers left. Continue through the trees, gaining elevation as you go. At the tree line, cross the open expanse. Keep your elevation while curving around to the right, towards the base of the headwall below the Bow hut. Climb the headwall, and ski the final distance to Bow hut.
Trail Head
Park at the Bow Lake parking lot, which is the turnoff at Num-Ti-Jah Lodge. This is a fairly large parking lot with several outhouse buildings. Do not park on the highway pull out.
The trail head starts from the south end of the parking lot. This area gets enough use that the trail towards the lake should be in. If not, then enjoy your early season ski as you break trail towards to the lake.

Crossing Bow Lake can take forever, especially if there is a sharp wind. The middle of the lake is usually wind-scoured, with no discernable trail or track. However, it is good fun to see the tourists on the lake, usually bundled up as if they were on an arctic expedition.

Main Trail
At the end of the lake, things may be a little mushy, depending on the time of year. Be prepared to skirt around open pots of water, and keep an eye out for your skis sinking in slushy ice. Or, this area may be completely frozen over.

Head over to the trees at the base of the initial climb. This is where I usually skin up. I am a big proponent of ski wax on the flats. There is no sense burning out my hip flexors on the flat Bow Lake.
This section of the trail is a lovely, curved path that gently starts the elevation gain. On the way out, it is a super fast luge track, so keep your eyes open for downhill skiers if you are coming in later in the day.
We skied out of the trees and into an open area. This area used to be thick trees, but a massive avalanche did some major logging. It is growing back now, but be aware.
Skirt around to the right, and continue across until you reach the top of the moraine. This is a short drop, but it’s steep and on a major sidehill. Skiing it with skins is an exercise in side grip. For the amount of trouble this little hill has given me, I unfortunately do not have any photos of it.
At the base of the moraine is the entrance to the canyon. This area is absolutely gorgeous, and I always tell my friends from out of town to take lots of photos.

It is a gradual ascent as we head up the creek bed, avoiding the gaping holes and rushing water beneath. The trail will cross back and forth across the water, depending on what looks good. Sometimes the trail can be very narrow, or on a steep side hill. If you don’t like what you see, go ahead and forge a new trail.

You do not ski to the very end of the canyon. Instead take the switchback ramp that leads to the ridge on the left hand (east) side.

Once on the ridge, it’s another trek through the trees on a narrow path. This route changes slightly every year, depending on who first put in the trail.

This is a spot where post-holers are extremely dangerous. It is too narrow for skiers to herringbone, and big holes in the snow pack means we cannot get purchase. If you are a winter hiker/snowshoer, then cut your own trail either above or below the ski trail. Skiers break trail every single time we go out. Snowshoers need to take responsibility for breaking their own trail.
At the end of the treed section, the whole panorama of the basin opens up ahead. It is a glorious sight! On the left is the route to Crowfoot Mountain. Straight ahead is the impressive headwall of Vulture Peak, and directly across on the right is Bow Hut, sitting on its shelf.
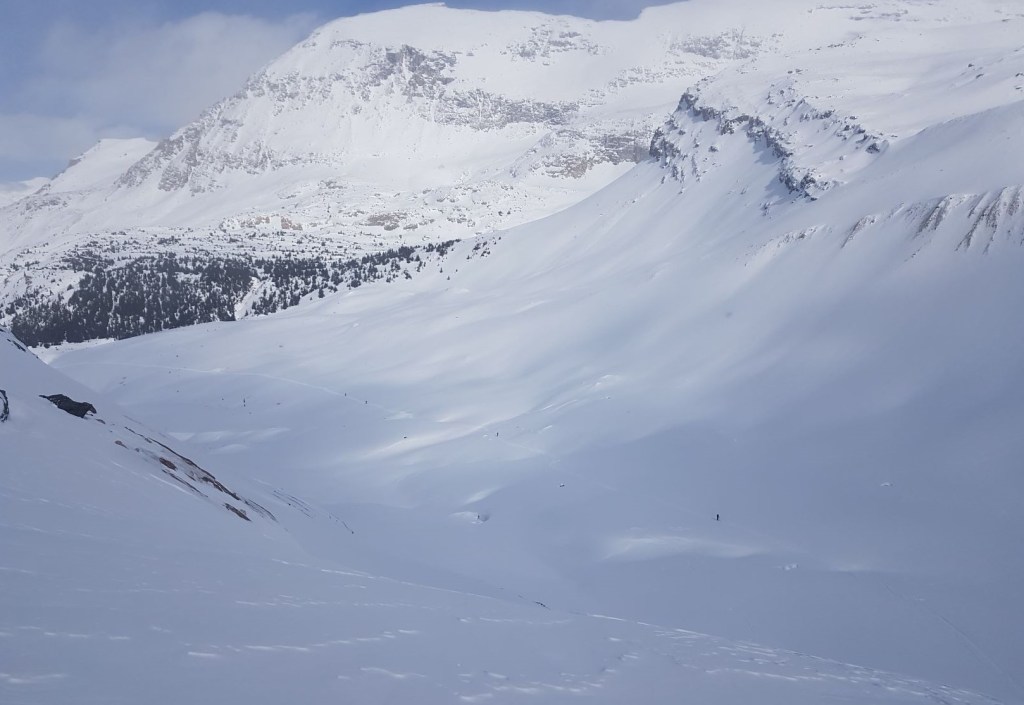
Without losing elevation or being accidentally drawn into the drainage basin, curve around to the right, following the base of Vulture Peak. Do not ski too close to the wall. This is the danger zone as the hanging glacier will calve off, setting off a massive avalanche that fills this entire basin. Move quickly through this area, and stay well spaced out.

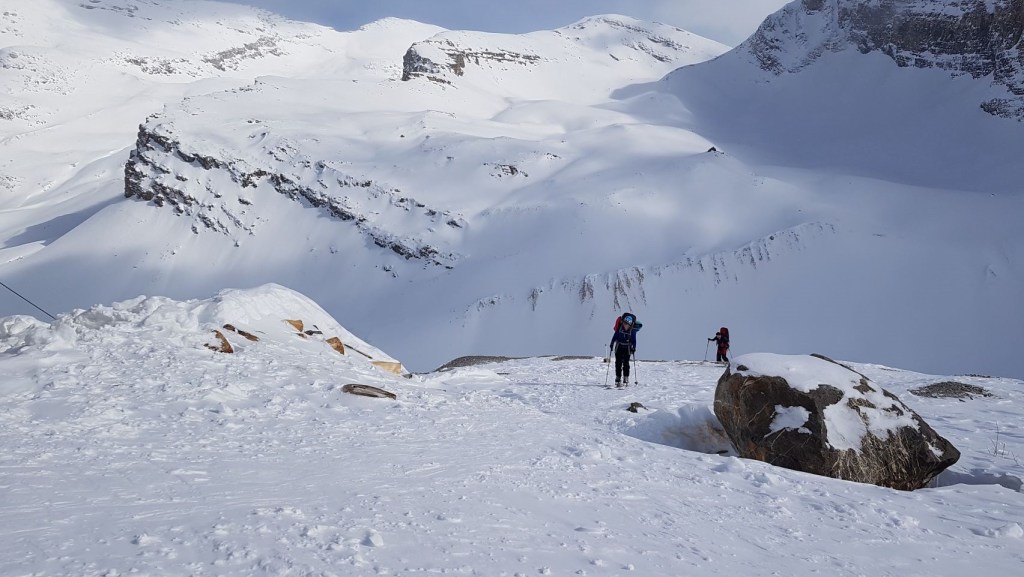
At the base of the headwall, avoid going straight up the wide middle gully. This is the descent route. Instead, do a big switchback to the left, and then one big traverse to the right that will pop you out on the far right ridge. You should be able to look down on the skiers below.
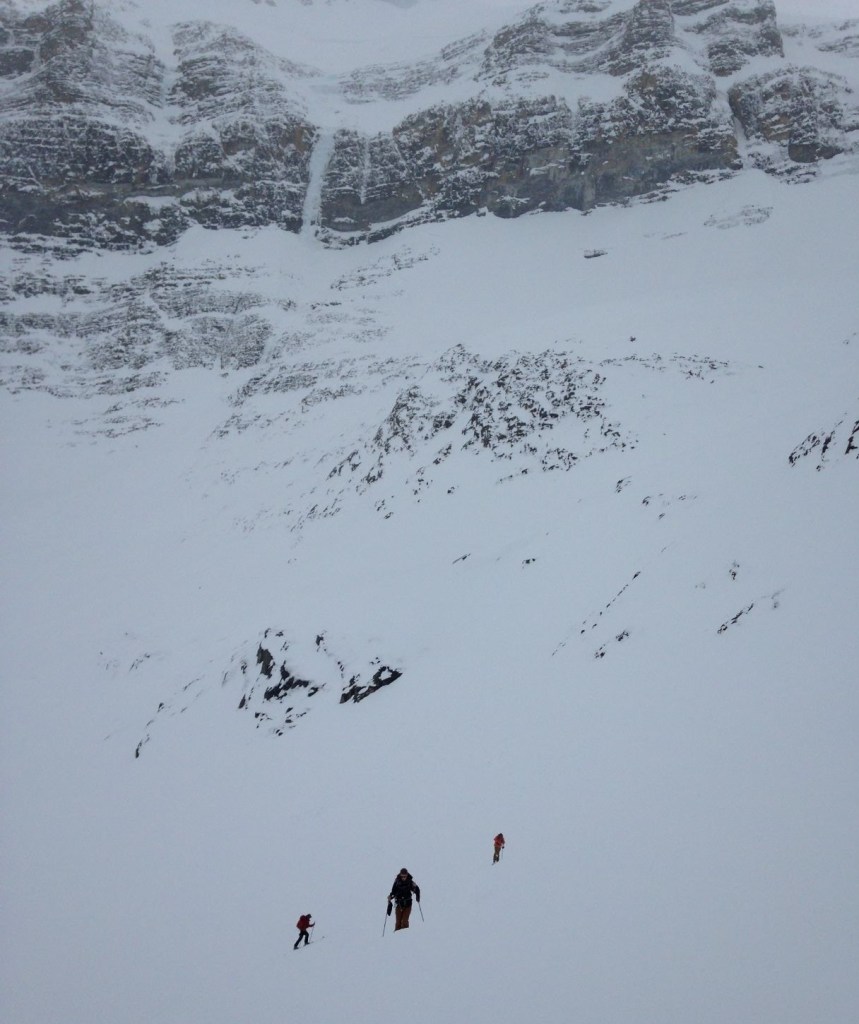

Please note the ski tracks below (foreground) go past the rock outcrop. Do NOT ascend the initial slope shown here. It avalanches frequently, and one party recently spent the night outside due to someone breaking a leg in the avalanche.

From this spot, avoid the temptation to beeline it for the hut. There are some big swales here. Instead, do a big switchback to the left, and another large switchback right.
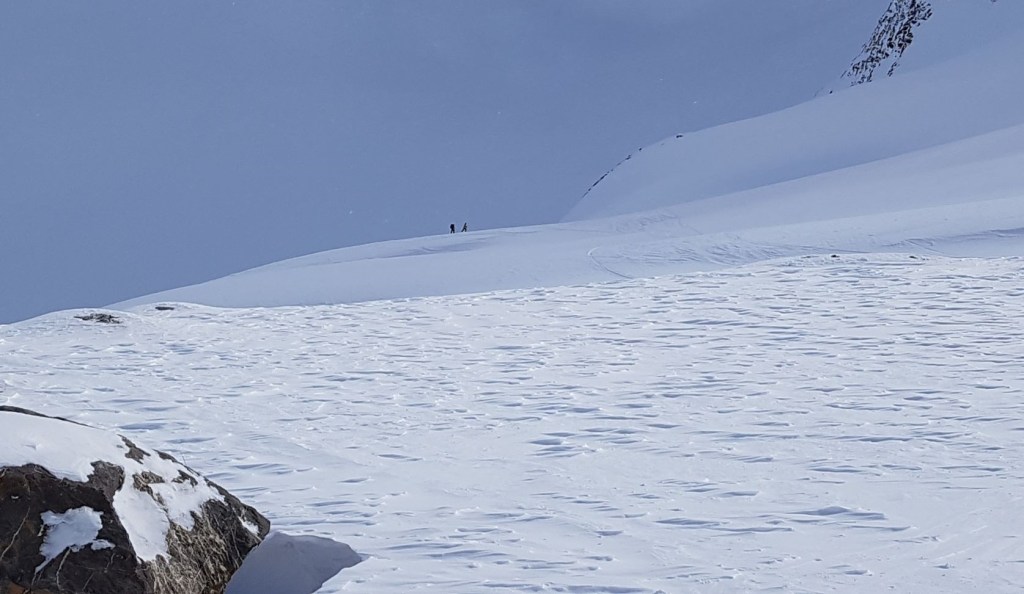
Ideally, you will end up at the wood pile and the grey water dumping station, just below the hut.
Distance to Bow Hut is about 6 km, with an elevation gain of 459 m. We ski it in about 3 to 4 hours, depending on how big our packs are. If we are doing one of the glacier traverses, we will be carrying full gear plus food for several days which naturally slows us down a bit.

Bow Hut Etiquette
The Alpine Club of Canada has an entire section on hut etiquette on your receipt when you book. However, as the Bow Hut is usually absolutely packed, and has a high percentage of new hut users, I thought I would outline some basic rules.
- Leave the hut nicer than when you found it. No one is cleaning up after you – only YOU! Do your part to keep this place clean. Wash the counters and sinks. Wash the table tops. Wash the stoves. Sweep and wash the floor. It won’t kill you to help out, and it will fill a few hours of idle time.
- Wash your dishes properly. People get upset tummies and food poising every year at huts because the person before them didn’t wash properly. Wash with HOT water and dish soap. Then rinse the dishes in a water solution with a few drops of chlorine bleach. Leave the dishes to air dry on the rack. I have seen people use a bowl and spoon, rinse it in cold water, and then put it on the rack. Disgusting!!!
- Refill what you use. If the water is running low, go outside and fill up the snow buckets. Do NOT stack the snow buckets because the floor is filthy. That filth then gets inside of the stacked buckets, which is the drinking water. If the wood is getting low, then chop up some more and restock the wood pile. Kindling is also appreciated.
- Change the outhouse barrel when it is full. Do not wait for someone else to do this job. Just grab some dish gloves, and head on out.

- In the winter, keep the stove going in the main lodge as it’s the only way to melt snow. Do not melt snow on the propane stoves as that is in limited supply.
- Heating the sleeping area is a touchy subject. Even in winter, do not overload the stove and smoke out everyone trying to sleep. If you are cold at night, grab a bunk close to the stove, or sleep on an upper bunk. If you are a hot sleeper, then get as far away from the stove as possible.
- When hanging up skins to dry, please fold them sticky side in. Otherwise, the entire room turns into a giant fly trap.

Anyhoo! Note the SKINS all folded with the sticky side in.
- Big groups need to be respectful of others using the hut. One time a large group from the Vancouver Island ACC Section set up crevasse rescue in the main hut. At night, they hogged the fire. When a group straggled in after dark and shivering from cold, they refused to budge from in front of the fire. Another time, a big group used every single stove burner in the morning. We are all trying to get ready at the same time, so be respectful.
- Try not to be a know-it-all jerk. I have met so many great people at the Bow Hut, and have garnered excellent beta as a result. Unfortunately, I have also met the opposite. One person accused another of not knowing how to use a compass because they didn’t want to attempt the route over to the Guy Hut in a whiteout. Turns out, that group had been to the Guy hut several times, and just wanted to actually ‘see’ it in good conditions.
- Finally, the hut is for paying guests only. No hut poaching – ever. It is very cheap to stay here, so just pay up and do your part to help out the Alpine Club. Maintaining these huts takes money and lots of volunteer hours. Don’t be a drain on the system.
This includes bailing on the Wapta Traverse. No one cares if you have four more days booked at other huts that you cannot get to because of weather. The Bow Hut is not your hunker down alternative. If you cannot move to the next hut, then you have to pack up and descend to the parking lot.
Bow Hut Return
To ski down from the Bow Hut, take the wide middle gully that you avoided on the way up.
As you near the base of this gully, take a look at your route across the flat expanse. The idea is to swoosh down from the gully with enough speed to ensure you get a good way across this flat expanse. No one wants to skin up for this short section. Be aware of the fairly good “whoop-di-do” divot at the base of the gully, which has caused more than one garage sale.
As you enter the trees, stay as high as possible. This allows you to stay out of the way of the uphill skiers on the narrow track. It also means getting in a few turns on the descent. You will cross a few open slopes ideal for a few turns.
Ski past the uphill switchback track that gains the ridge. Instead, go a little way further until you find the wide slope down to the canyon, marked by a rocky wall blocking your way forward. This is the down track to the canyon.
Again, eyeball your route in the canyon, because the dream is to keep enough speed to propel yourself a good distance down the canyon. A little bit of grip wax underfoot goes a long way to keeping you moving in the right direction.
The big decision point is at the end of the canyon and the base of the moraine – to skin up or walk up? I will tell you now from experience, the fastest way is to skin up. Why? Once you reach the top of the moraine, there is a slightly uphill traverse that requires skins. One time we did a race between skinners and walkers. The walkers got the early lead, but the skinners soon overtook the walkers on the traverse. Trust me. Skin up.
After the short traverse, whip off those skins and enjoy a short but fun trip down the 20+ year old avalanche path. This leads into the luge track (watch for those uphill skiers), which spits you out at the base of Bow Lake. Your pure euphoria after a fun ski out should be enough to propel you back across the frozen lake in record time.
If you found this post useful, please do me a huge favour and click the Star button to “Like” it. You can also follow my blog, follow me on Instagram, or join my FaceBook page Al’s Adventurers.
Alisen
Totals – Tracked on Strava
Date: Too many to count
Group: Two to six, depending trip
Distance: ~6 km
Elevation: 459 m (1,514′)
Time: 3-4 hours


I love all things mountains! I live next door to the Canadian Rocky Mountains, however I travel the world to enjoy the many different mountain environments and cultures that I can. I hope you enjoy these trip reports, and that it inspires you to accomplish your own adventure goals.

Amazing photos! It sounds like very hard. You must be super fit!
You are exactly right! Sometimes it is easier than others depending on how fit I am. The extra gear definitely weighs me down.
I’m seriously impressed 💕 I can’t even begin to imagine carrying all that weight!
What a great post! Plenty of info and really nice photos.
Also, nice to share the Bow Hut Etiquette. Well done.
Thank you very much! The etiquette really is the hard part. However, it’s all about education and helping people learn. I was once a newbie up there too and had to learn the ropes. Unfortunately, I had to learn to not stack the buckets more than once 🙂
Wow! Nice!
Thank you! I am glad you liked it. There is more winter wonderland to coming soon.
Wow, that’s awesome!
This is funny – we got married at Num-Ti-Jah too!! Except it was June and the manager was our witness, maybe it was your friend! We love Bow too and have been so many times, I have experienced every one of your good and bad examples too. I guess we won’t see you there this year since you have to book the whole hut, but maybe next year. Great post with great info.
Oh! That’s fantastic. We were married when Lee was running the Lodge. He and his wife were there for some time, but they have since moved on.
I was telling someone else that I’ve never been to the Bow hut in the summer. I hear it’s beautiful 🙂
I was thinking of booking the Bow this winter for a few days and just hitting some peaks in the area, but I think it would be so lonely up at the hut without all the hustle and bustle. 😦
I can’t remember his name, it was 12 years ago. Bow Lake was really pretty because there was still a lot of snow above. Bow Hut this winter would be a great, quiet escape.
I was married 20 years ago! We wanted to get married in 2000 so it would be easy to remember how long we were married 🤣
Hahaha.
Enjoyed your blog. Interesting to hear the Num-Ti-Jah lodge being metioned. Even though I do not live in your part of the world, I have at least been to the place! We stayed there one night during a Jasper to Banff bike ride in 2017. We walked to the falls one morning before starting the ride for the day.
That’s a great ride – good for you. Do you do a lot of cycling? I love that old Lodge. I hear the falls are beautiful. It may surprise you to know that I’ve never been to this place in the summer!
The falls are great, and worth the walk from the lodge. I do not ride that much – perhaps once a week when the weather is OK. I am an amateur. Took up biking once again only in 2016.
I’ve always enjoyed cross-country skiing, but cross-country skiing in the mountains takes it to the next level! This looks like such a fun (and challenging!) adventure. I’ve always wanted to do something like this where you ski / snowshoe to a cabin to spend the night.
It truly is a grand adventure. There are many cabins in Alberta that you can cross-country ski to without any avalanche danger. Once is Elk Pass or Elk Hut. It’s in BC but the track starts in Alberta so it’s fun to cross the continental divide. Another is Cameron Lake in Waterton National Park. For the luxury winter traveler, I highly recommend Skoki Lodge. It is Canada’s first backcountry ski lodge and pre-dates the Lake Louise ski resort. It is expensive, but the food is amazing and the location is outstanding. I’ve been five times!!! There are many more winter huts and lodges to explore – I could go on forever!
Good to know. I never really thought to visit Alberta during the winter, but now it seems like it might not be a bad idea!
You all are so brave💕
It made me scared already by watching pictures 😆
But I miss the beautiful snow mountain ❄️☃️
Well, I am missing the sun and beach!!! We are hoping for a trip in April so fingers crossed we get vaccinations and rapid testing.
Thank you for thinking me brave 🙂 I love this trip, and will probably not be able to get back there this winter due to Covid. Maybe next year…
Fingers crossed too🌈
Amazing post 😍
Alisen, I stumbled upon this post after just skiing into the Bow Hut, and looking for the “nickname” of the Bow Hut Headwall avy danger (I think it was called the Mouse Trap but can’t confirm this) Saw the picture of Franz, and FYI I was once Debbie’s boyfriend (dates back to the eighties) He must be close to ninety by now, and I certainly recall Roberta and Franz’s kindness when I came to visit. Mike and Tony would probably remember me. Please give my best to all. Cheers- Jim
Jim!!! Yes, Mike absolutely does remember you. Thank you so much for contacting us. I do hope you are doing well. You must be if you’re still out backcountry skiing!
Franz is turning 89 years old this year, and Roberta is still going strong too. I will definitely pass along your Hellos to them all.
I have just met another friend of Deb’s – Nancy – from high school. We are now skiing twice a week together. Small world!
Take care, and perhaps we will meet at the Bow Hut again in the future.
Alisen
Christmas is far approaching and with what is going on i think we’re about going for another lockdown, the reason why I ask you if you have ever been into any online earning businesse, is because i am into one….!! alot of people and i am real benefiting from this businesse so as to other people… i don’t know if you would love to part of it what are your thoughts on this??