February 19, 2020
Cornice Ridge is the first major feature at Kootenay Pass on the north side of the highway. It offers immediate elevation gain and quick access to some spectacular skiing.
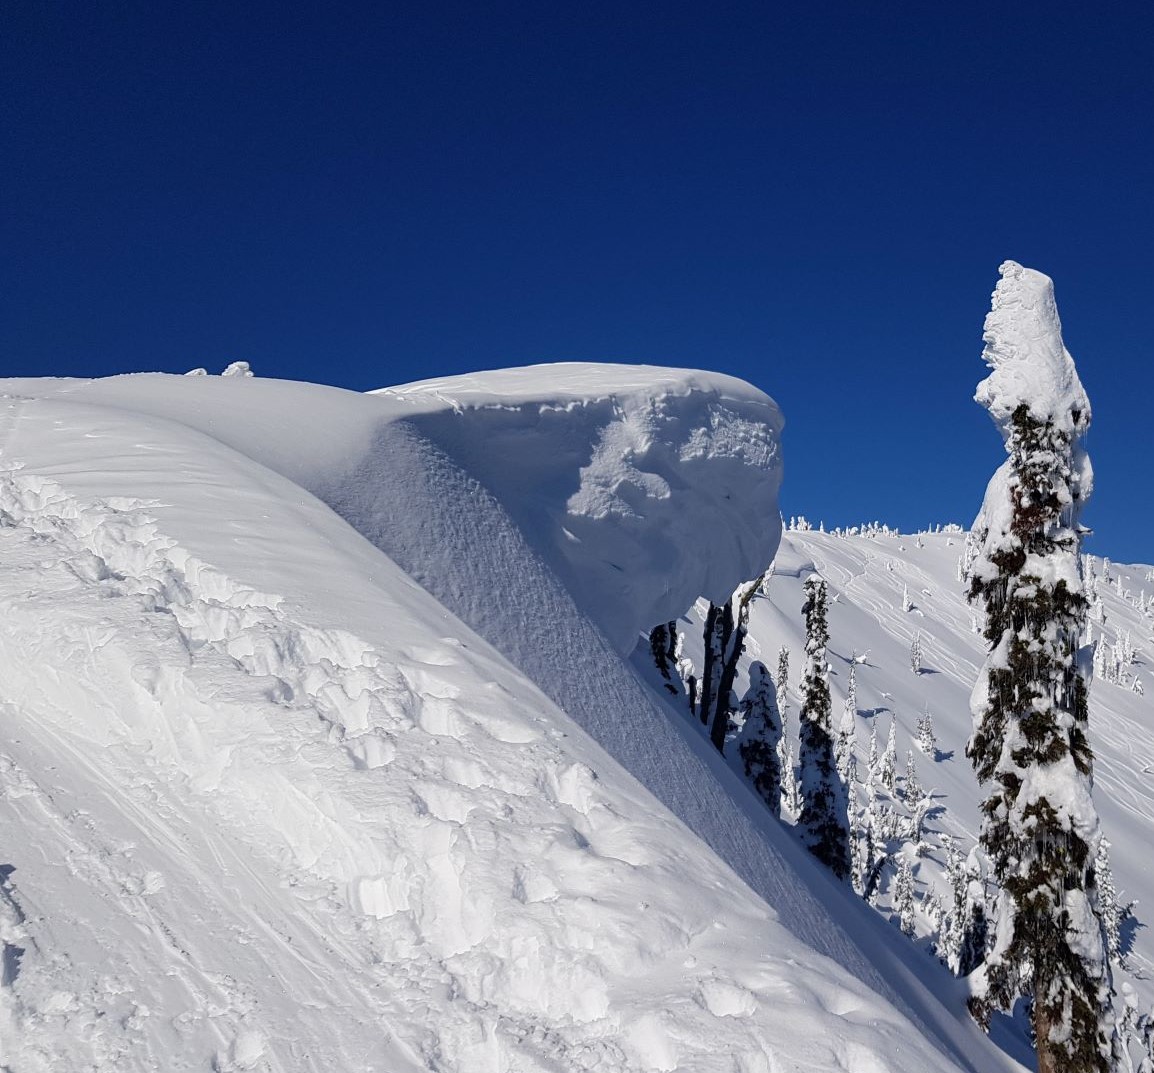
It’s not called Cornice Ridge for nothing!
I highly recommend that backcountry skiers continually update their skills. Last year we redid our AST1, and this year we did Leadership Training. Both were with my favourite guide Jen Olson. Jen is a veteran and a pro. She is also a certified teacher, so has a variety of tools to use when trying to teach complex topics.
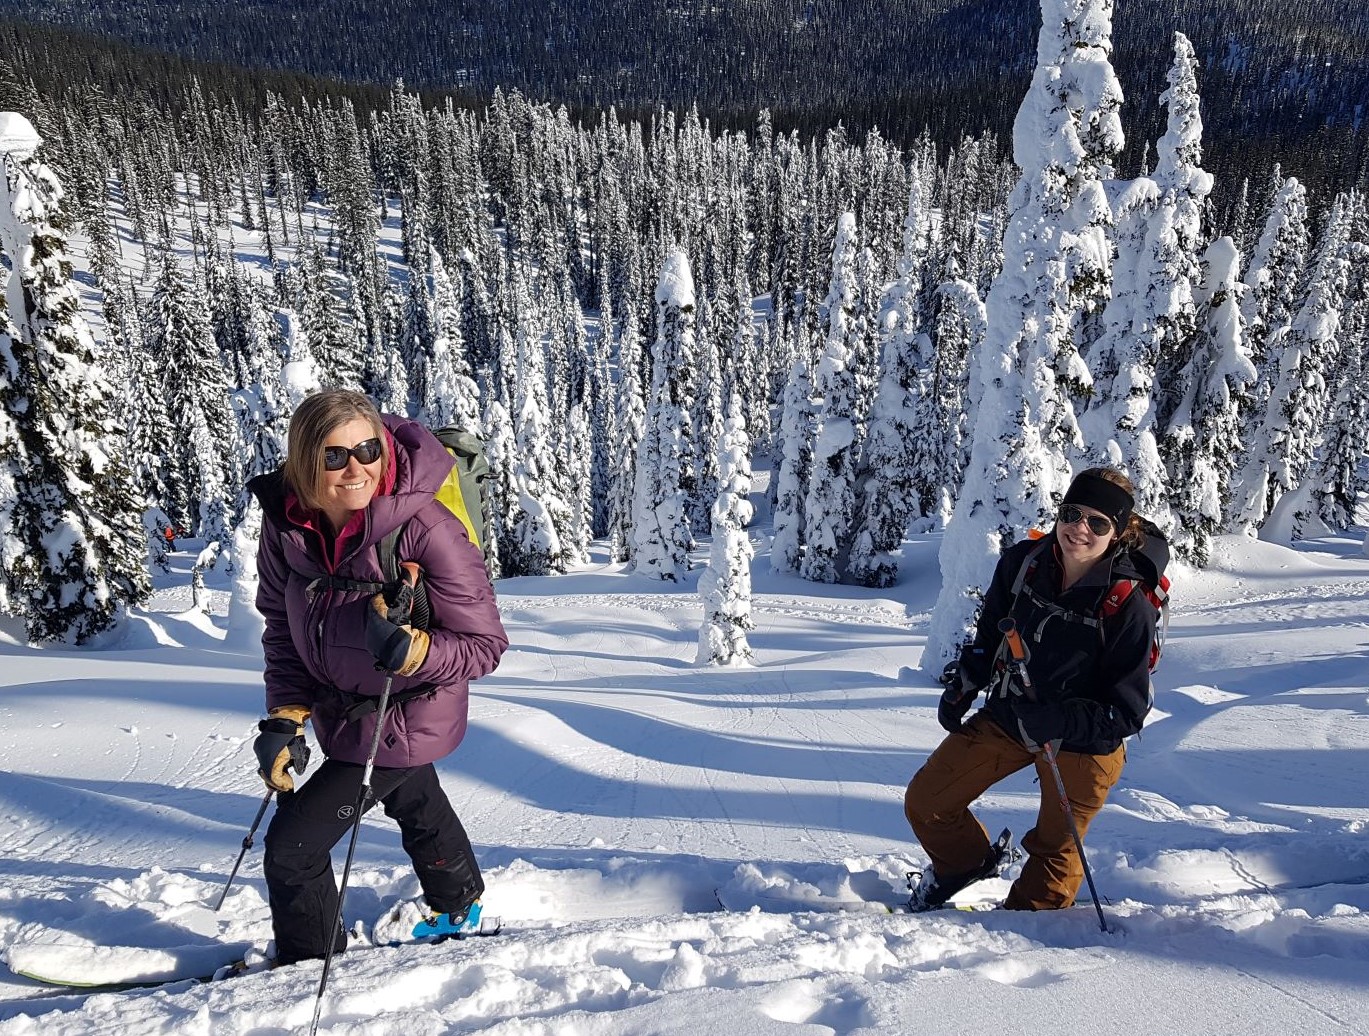
Today I was skiing with Jen, my husband Mike, and our twin daughters Kayla and Mackenzie. We all took turns leading sections, proving to all that putting up a good line is harder than it looks.
Gear
For backcountry skiing, I am fully kitted out with dps skis and Dynafit bindings. I’ve skied on this set up for several years, but I have a new pair of Scarpa Gea boots that I am working in. I gave my old Scarpa F1s to my daughter. They were not stiff enough for me, but my kid loves how lightweight the F1s are.
I recently re-glued my G3 skins, as they went all gooey on me. I’m glad I did though, because the new Black Diamond glue is working great.
Conditions
We were very lucky to hit the weather and the avalanche conditions just right. There was a pow dump a few days before, so we were right on time to get some fresh lines. The blue skies and excellent viz were a real treat. Avi conditions were Moderate, Moderate, Low. Ongoing problems are sun crust on the south side of the ridge, and cornice build up on the lee side.
Specific problems are a buried rain crust, and a more recent storm event sitting on top of a hoar frost layer. So while the overall conditions were looking good, the specifics still required some thought and management.
Overview
Cornice Ridge is the first feature in the terrain, and the approach is straight forward. There are several descent lines to choose from, and some options to haul back to the highway.
Trail Head
Park in the lot at the top of Kootenay Pass. Start at the almost completely buried shelter (just up from the outhouses). From here, we headed straight into the hills, as we made our way up the shoulder of Cornice Ridge.

The parking lot at the Kootenay Pass beside Bridal Lake is packed on a Wednesday. I can’t imagine it on a weekend.

The shelter at Bridal Lake at Kootenay Pass. We did our transceiver check here.
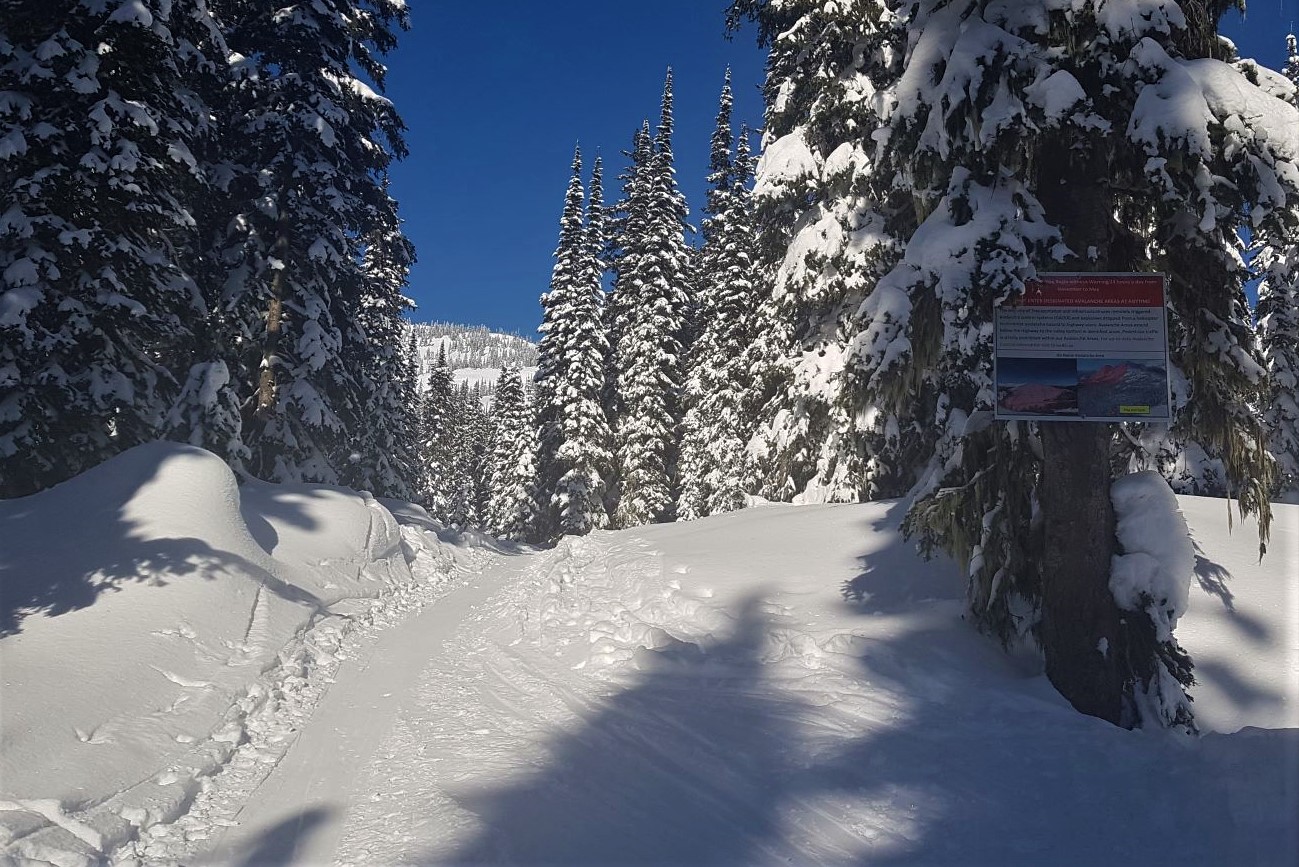
Sign showing permanent avalanche closures. You’re on the right path if you hit this.
Main Trail
You have a choice of routes to Cornice Ridge. The first is to simply follow the ridge line straight up to the summit.

Our first glimpse of Cornice Ridge (left) and Buzz’s Ridge (right). Very thankful for the great visibility.
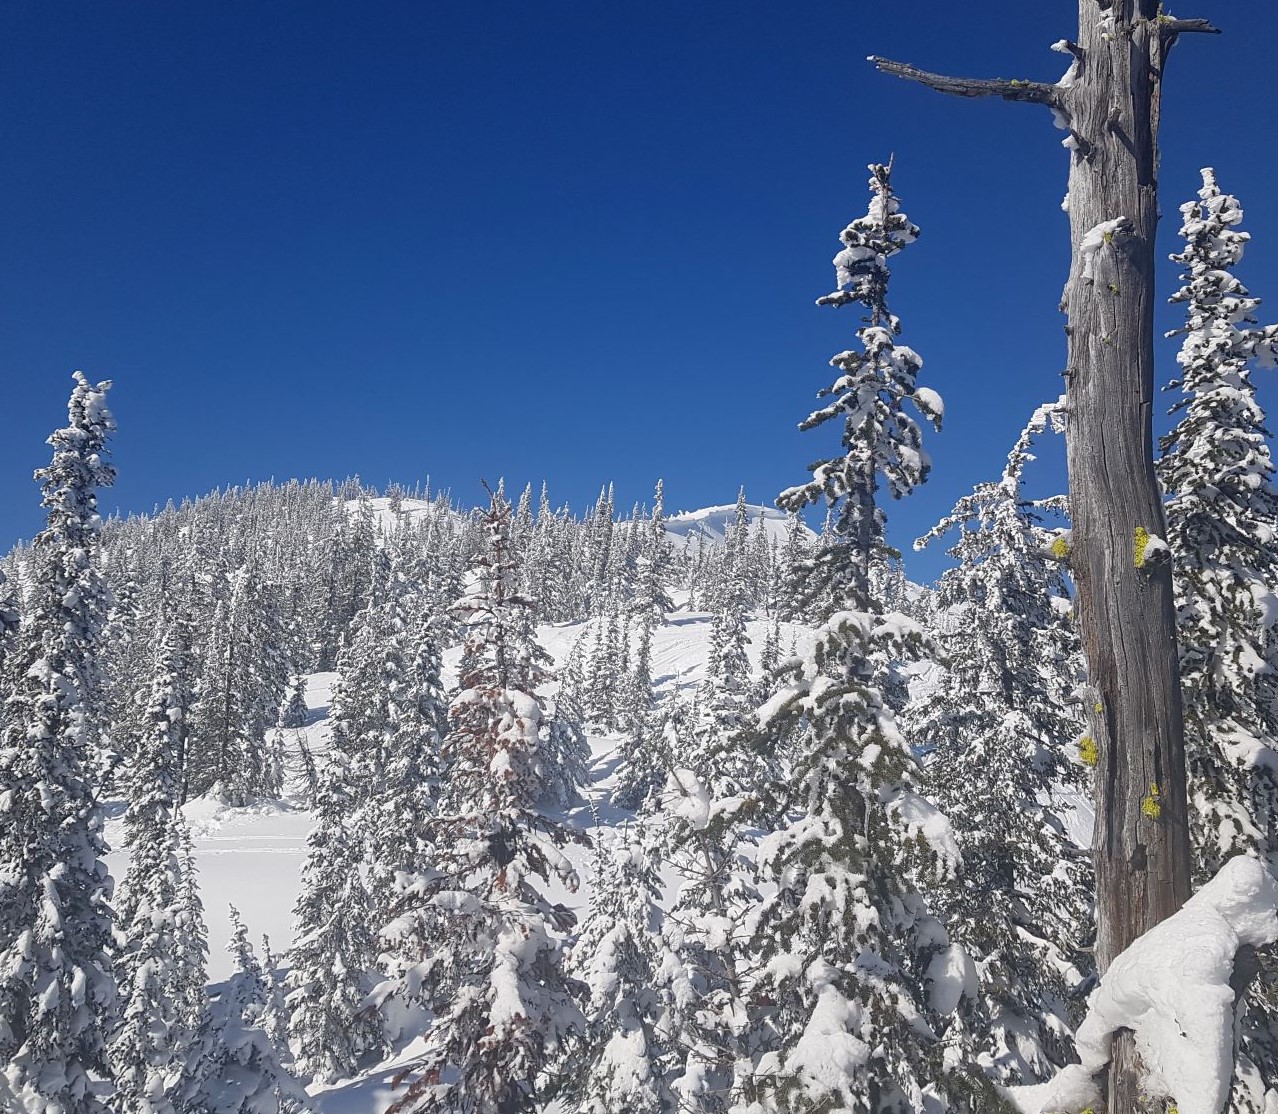
This is the route straight up to the summit of Cornice Ridge.
We chose to take the lower route, and ascend via the Cornice – Buzz’s Col. This would give us more navigation challenges and opportunities to set our own trail.
When my daughter Mackenzie was leading, we lost some elevation, missed our objective, and had to climb a narrow steep slope to get back on track. Was this bad? Heck no! It was excellent route finding learning. Plus, we got to practice our kicks turns. There is nothing like doing kick turn after kick turn with a guide showing you some tips to really up your game.

Mackenzie leading, and Jen showing us the finer points of kick turns.
We made our way back to the base of the col, and had a really enjoyable ascent.

Looking up at the Cornice – Buzz’s Col.
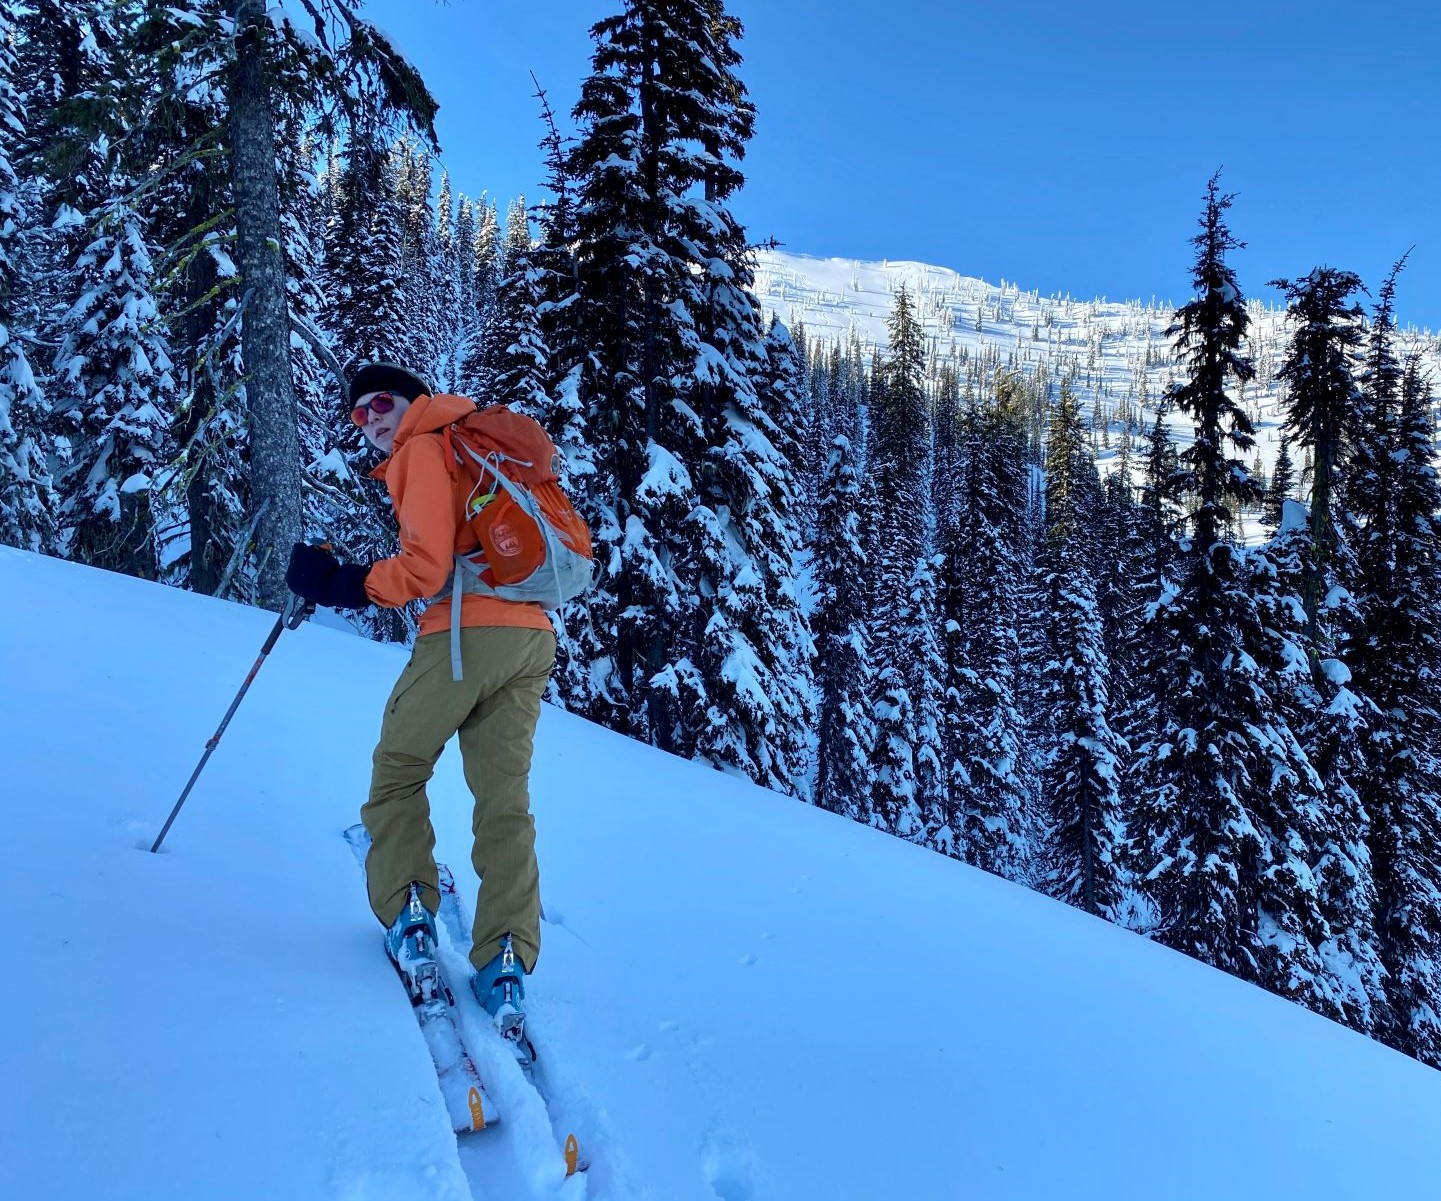
I was leading this section, and worked on making the most of the terrain to put up a good line. My husband Mike usually leads in the winter, and he has a natural feel for the terrain and when to put in a turn. It’s definitely a skill anyone can learn but does take practice.
Jen and Mackenzie skinning up to the col.
The major danger going up the col are the cornices towering overhead. As Jen mentioned, not all cornices are created equal. Some were supported by ‘bellies’ while others were completely unsupported and would eventually fall, causing one heck of an avalanche. Hopefully not till later in the season.

The cornices above were a mix of supported and unsupported.
Once on top of the ridge, we were treated to the most amazing views. Not only could we see the surrounding mountains and terrain, but we found all the snow monsters!
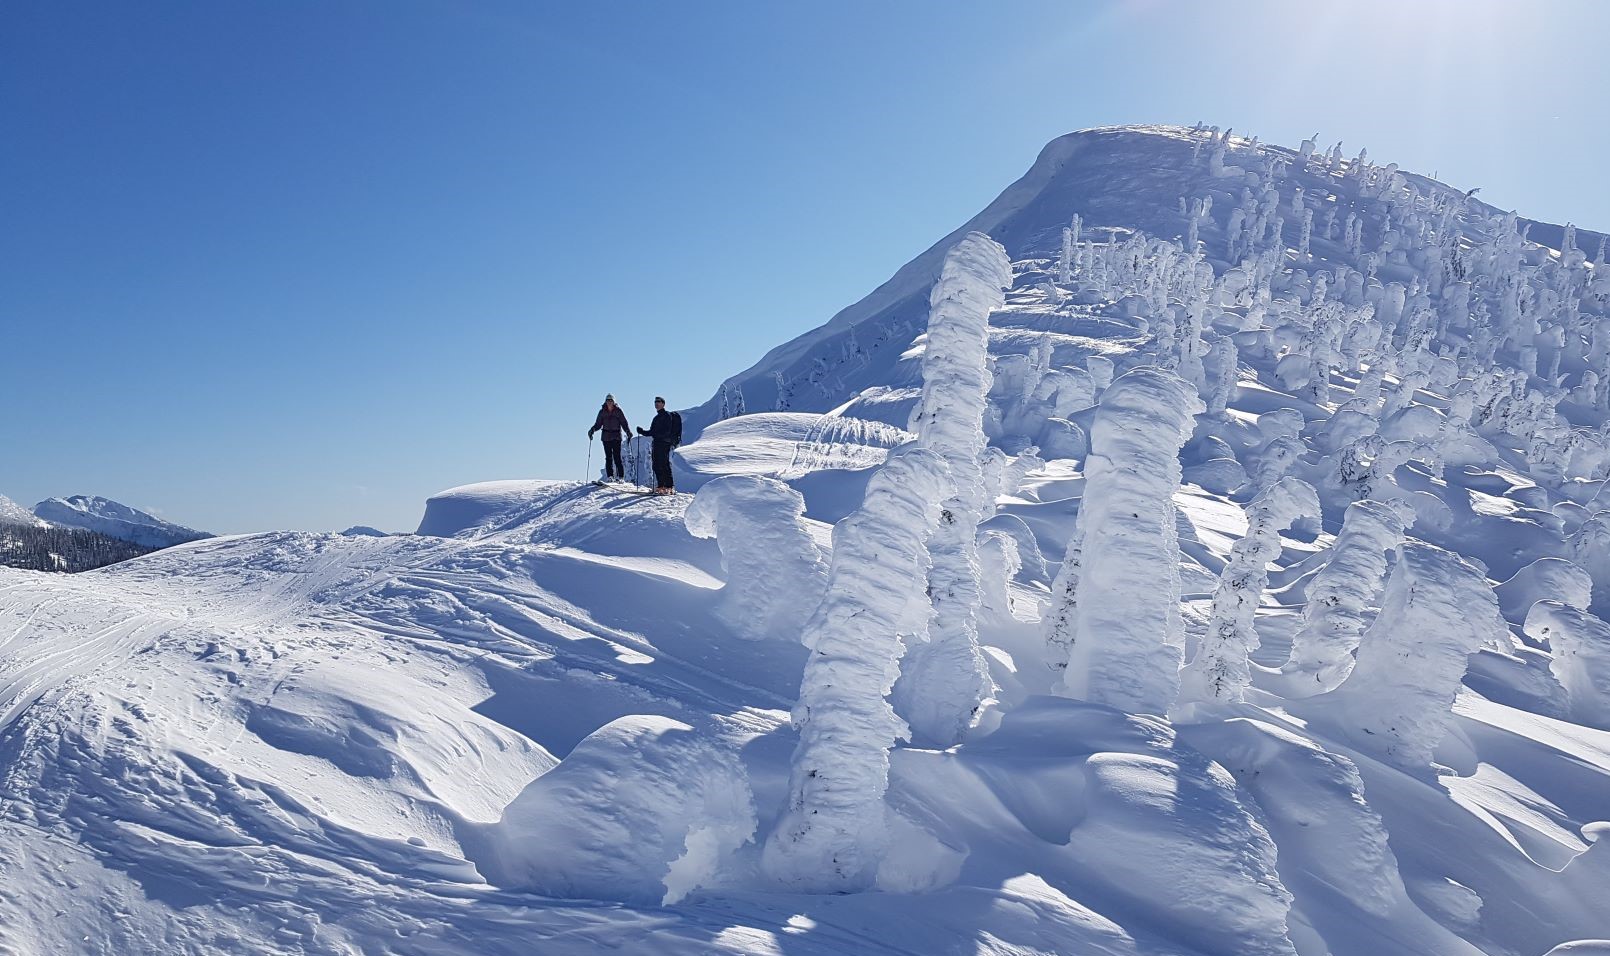
Jen and Mike, with the summit of Cornice Ridge behind. The snow monsters were insane!
Ski Lines
The whole ridge was getting farmed, but there was still lots of terrain to ski. From the col, we picked out a likely ski line, and then marked it to ensure we could find it from above.
As we made our way along the ridge, we were careful to stay back from the edge. From above, it’s hard to say whether you are on rock or hanging out over one of those unsupported cornices.

Staying well back from the edge. Photo credit: Jennifer Olson
We skied down some of the best powder ever! The angle was nice and steep, and the pow was deep. From the base of the run, we continued to ski down into a lower valley to keep the turns going.

Looking back along the ridge, with lines of ski tracks in the foreground. Photo credit: Jennifer Olson
Cornice Ridge Return
There are a few options to return. You can regain Cornice Ridge and head up to the summit. From there, you can ski down the ridge line back to the parking lot.
As we had descended lower into the valley, we more or less retraced our path, following the contours of the land as we made our way around. This was very enjoyable, with a gradual uphill to get over the hump of Cornice Ridge.
My other daughter Kayla was leading this section, and she was not happy about it. Kayla is that kid who likes to bring up the rear, so being out front making decisions is not her idea of fun. I really have to give it to Jen though. She was so incredibly patient with Kayla, and gave her just the right amount of coaching. In the end, Kayla had a big smile on her face, and was quite proud of her route.
Kayla setting the track back to the car. She’s in-between steaming mad and slowly coming around. Jen’s pretty brave and tenacious for not giving up on Kayla. In the end, Jen prevailed and Kayla had a great time. I stayed at the back of the line and pretended to study various snow flakes
On the hill right above the parking lot, make sure to stay far enough left so that you don’t accidentally get sucked down to the right away from the parking lot. Also, don’t go too far left otherwise you have a long flat haul back to the car across Bridal Lake.
I hope you enjoyed the trip up Cornice Ridge. If you found this post useful, please do me a huge favour and Like it here on my blog. Or you can go to my facebook page Al’s Adventurers and like my page.
Alisen
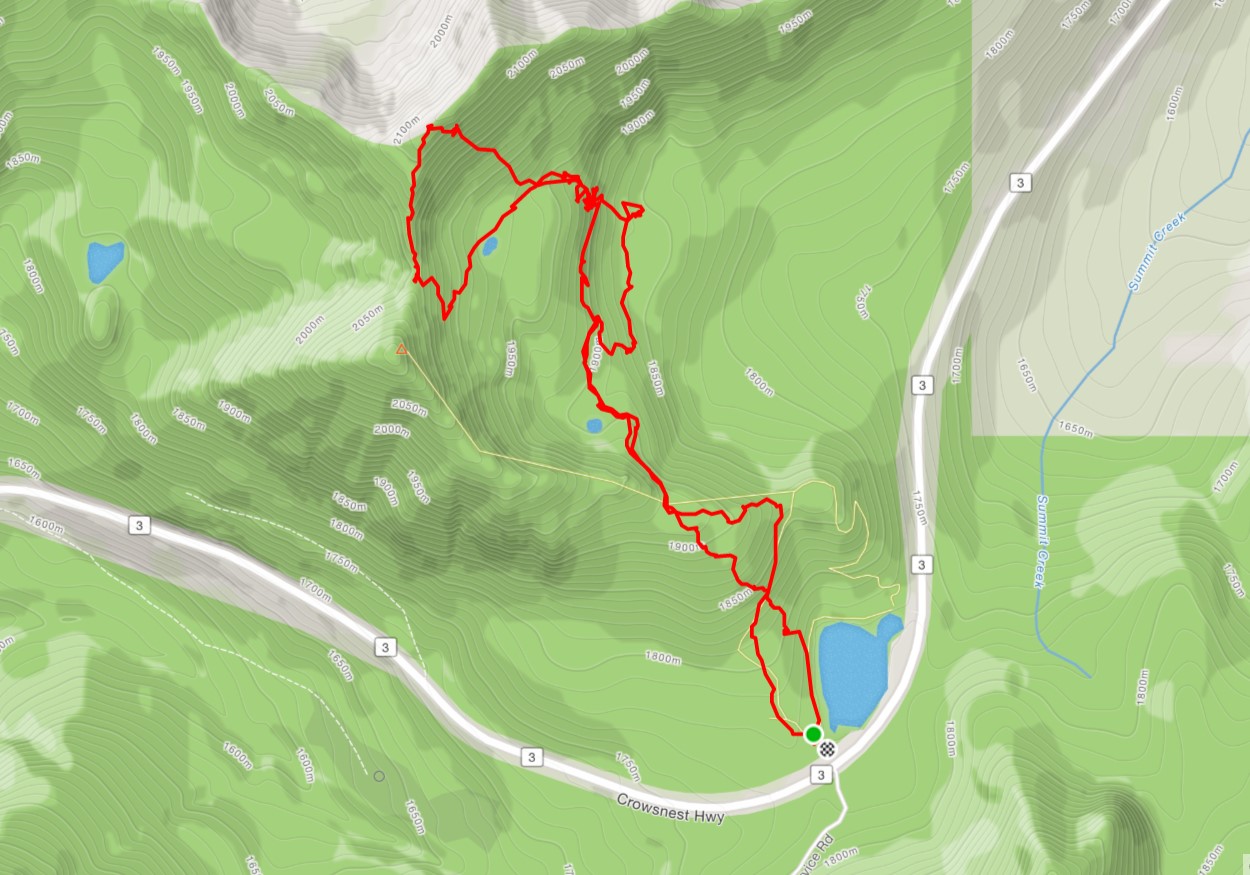
Totals – Tracked on Strava
Date: February 19, 2020
Group: Five (Alisen, Mike, Jen Olson, and twin daughters )
Distance: 7.3 km
Elevation: 515 m (1,699′)
Time: About 3 hours moving.
We were stopping lots to learn concepts and discuss options, so our time is not accurate for someone doing a normal tour.
The summer route is marked, and starts at the other end of the lake. There is a second parking lot there.

This is a very accessible tour, with gradual elevation gain.
I love all things mountains! I live next door to the Canadian Rocky Mountains, however I travel the world to enjoy the many different mountain environments and cultures that I can. I hope you enjoy these trip reports, and that it inspires you to accomplish your own adventure goals.

So beautiful a trek and skiing location..!! ❤ 😊
How does it feel Madam to wake up everyday to this magic? ❄❄❄❄❄
Wonderful post, yet again Madam..!! You came back to blogging with a bang..!! 😀
I see you noticed my absence. Blessings to you. I have been dealing with a personal issue. It threw me off my game, but I am back now.
I hope everything is alright. It’s always good to have you back in the peak of your spirits and enjoy your travels and adventures.. Your travels are an inspiration.. ☺️