February 24, 2020
Plus numerous times over the past 25 years
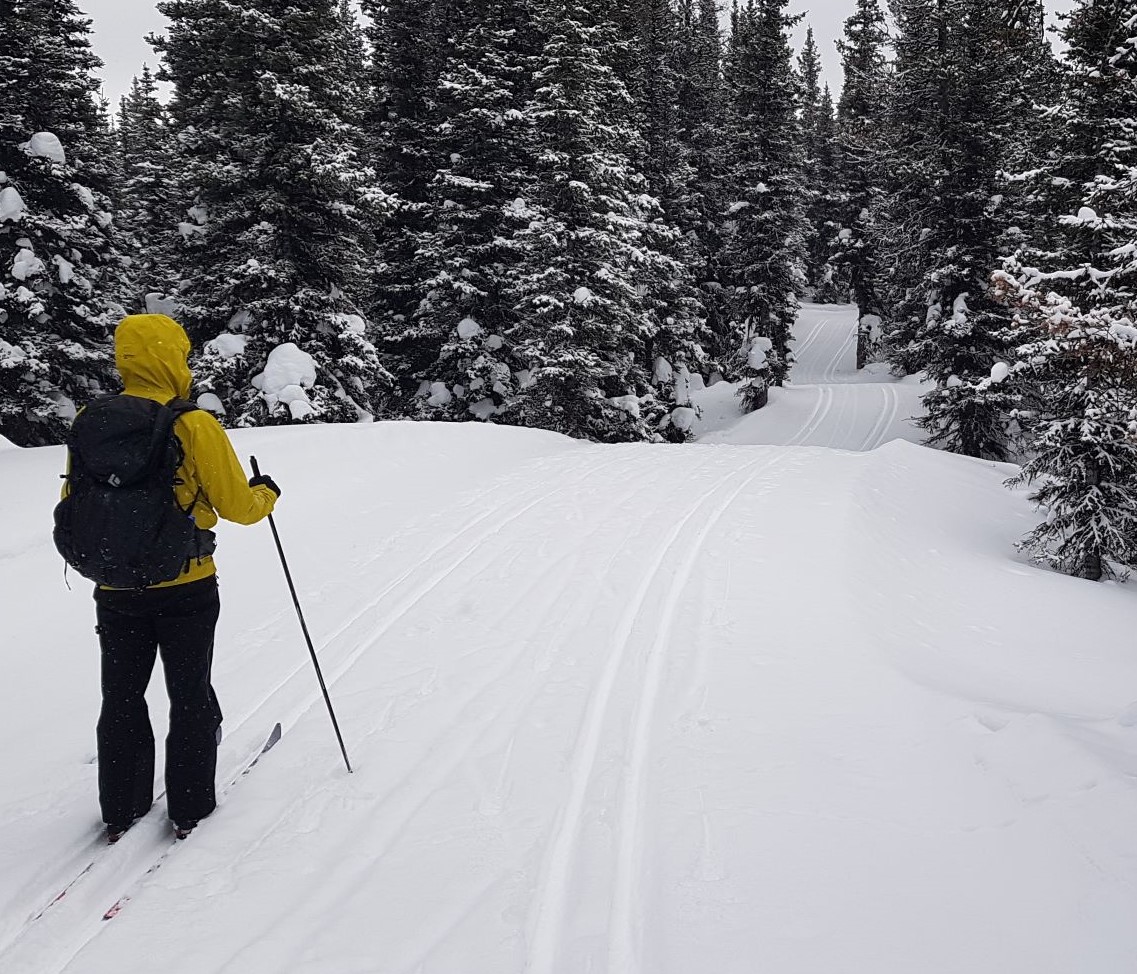
Blueberry Hill is a great extension to the general Elk Pass area in the furthest reaches of Kananaskis Country’s Peter Lougheed Provincial Park. It is a classic ski tour and is done multiple times a year by the dedicated ski enthusiast. The Blueberry Hill trail is ever changing – sometimes it is perfectly track set, sometimes it’s so icy you fly back down in mere minutes. Other times it’s under a foot of fresh pow, and I wonder why I’m not out backcountry skiing!
Gear
I’m using my trusty 20+ year old Karhu Criterium skis with metal edges, and my Alpina ‘backcountry’ cross-country ski boots that go with the heavier binding bar. Most people are out here on regular cross-country skis, but I like the extra weight to ski the downhill sections in control and comfort.
Overview
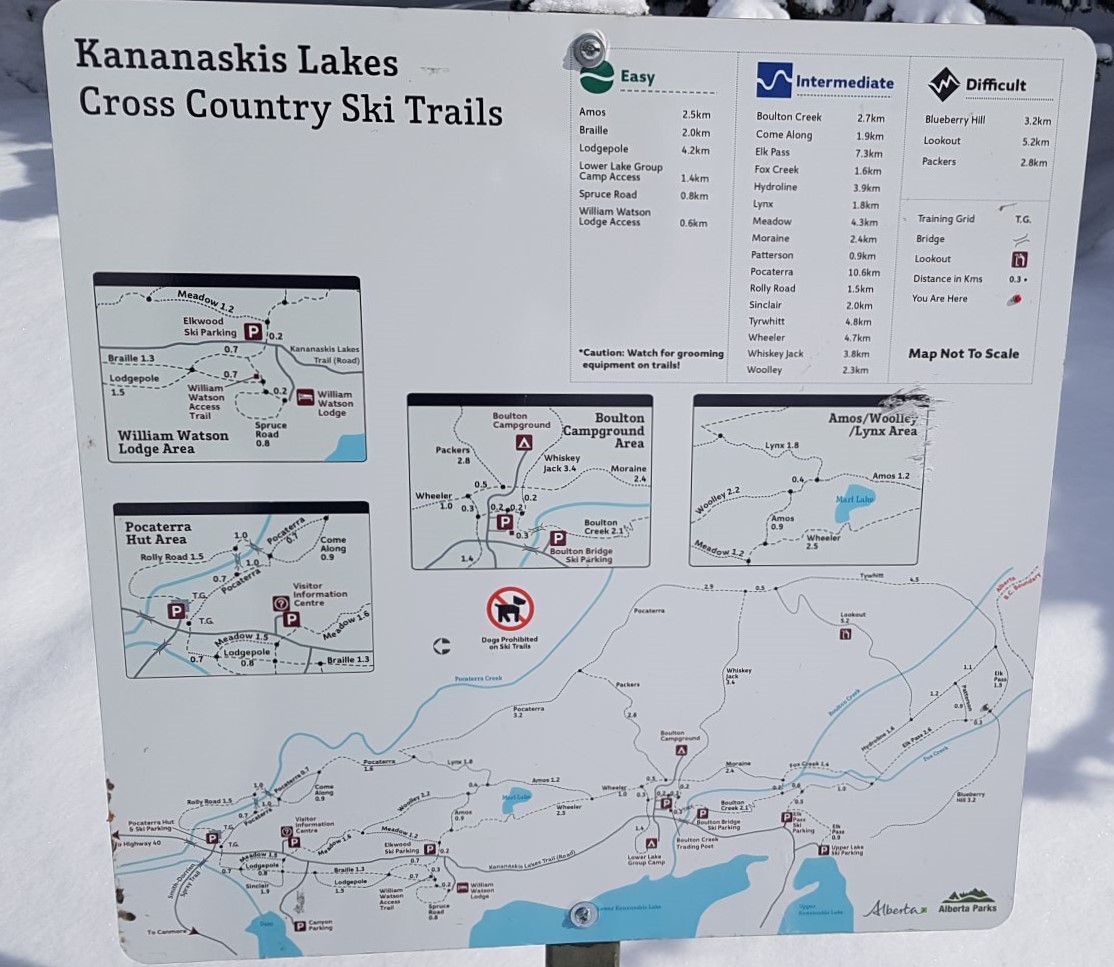
From the parking lot, Blueberry Hill is accessed by turning Right at every T intersection, of which there are three. Return the way you came.
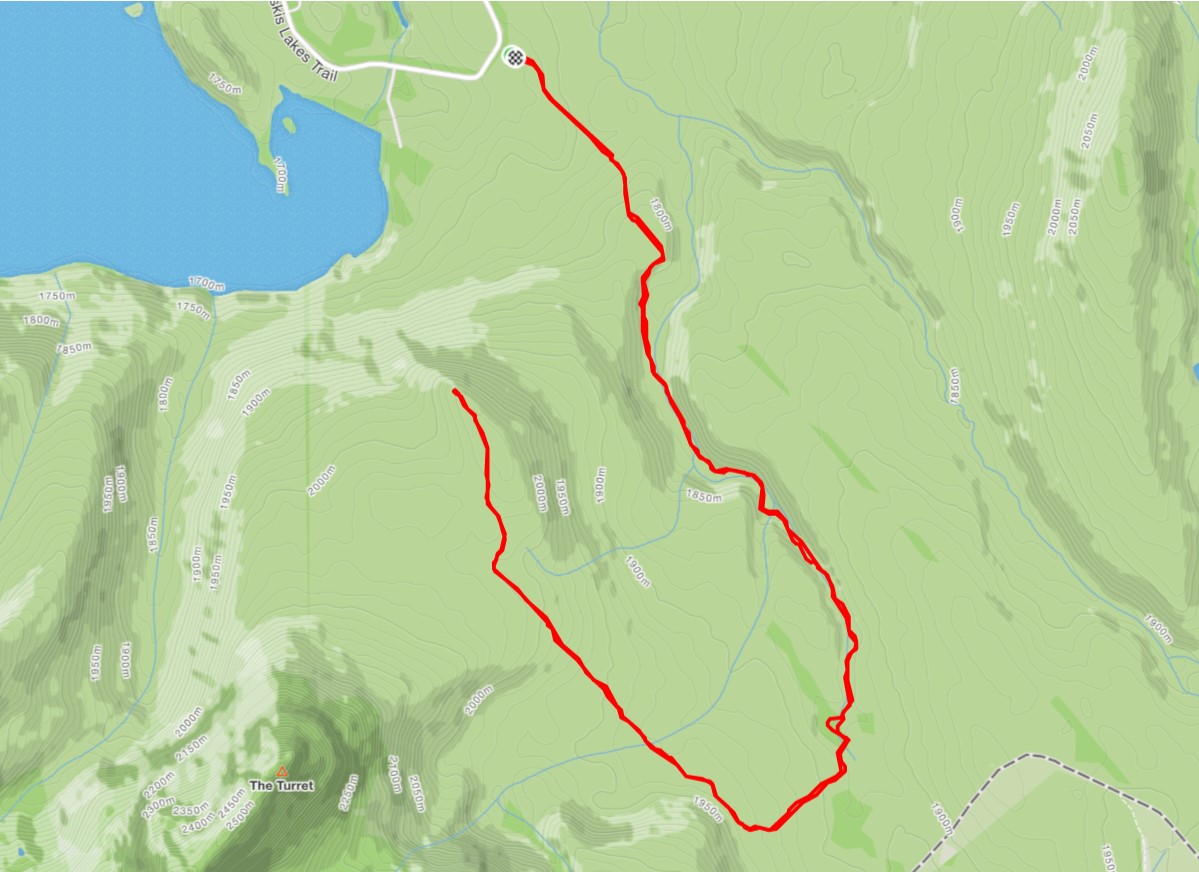
Totals – Tracked on Gaia. Displayed on Strava
Date: February 24, 2020
Group: Two (Alisen & Mike)
Distance: 15.8 km
Elevation: 367 m (1,213′)
Time: 2 hours 30 minutes, plus 30 minutes for snacks and lunch

Watch the VERY entertaining Video
This video was taken February 5, 2026 during an intense warming period. Conditions are NOT usually like this. We had a tonne of fun making this funny video. Hope you like it!
There are many trails at Elk Pass that will take you to various places like the actual Elk Pass, and over to the ACC Elk Lakes hut. Recently, multi-use trails have been added for snowshoers, winter walkers, and fat bikes. Despite having their own trails, these other users repeatedly decided that walking on ski tracks was the way go to. So I was VERY happy when K Country finally started to deal with the problem this winter.
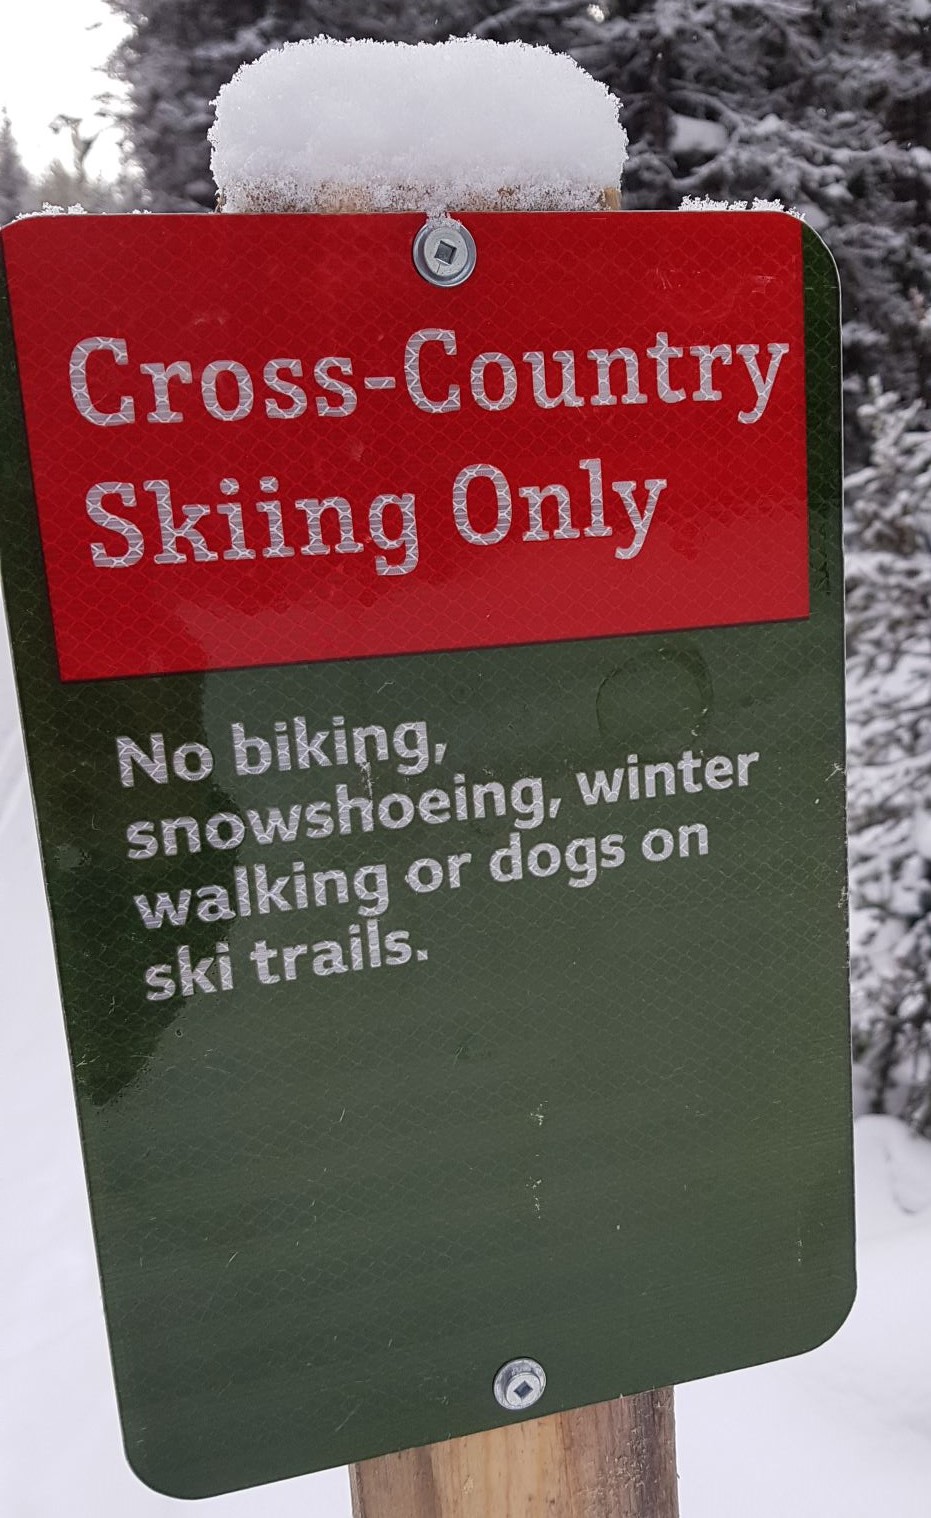
Non-skiers will now be fined if they walk or ride on ski trails. This has eliminated all non-skier traffic, and reduced many uncomfortable confrontations.
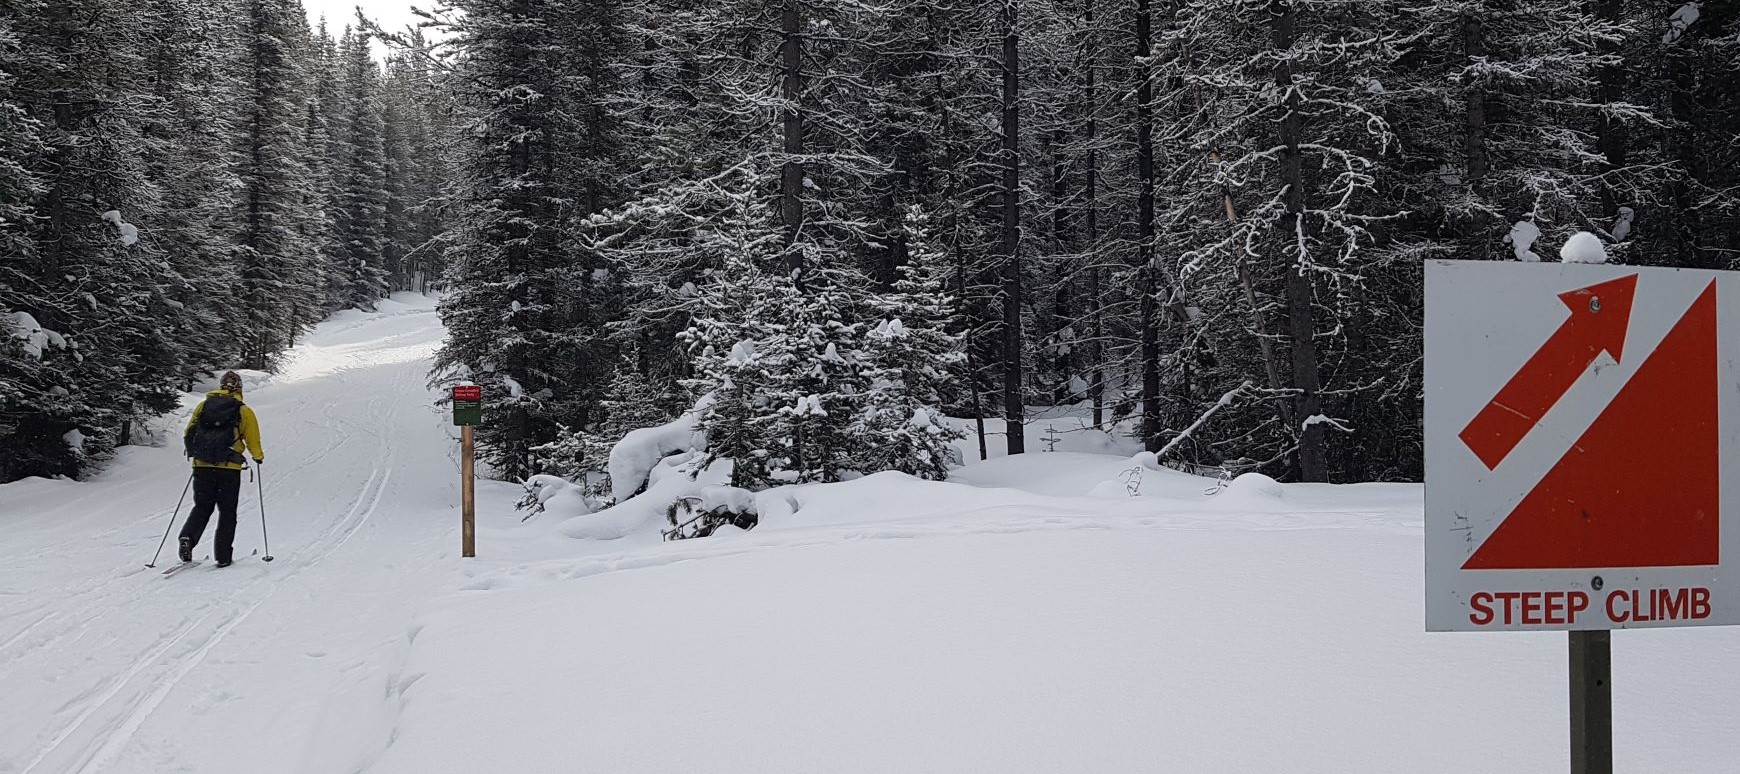
Trail Head
There is a good sized parking lot at Elk Pass. It has a big four person outhouse, and a large sign to mark the start of the trail.
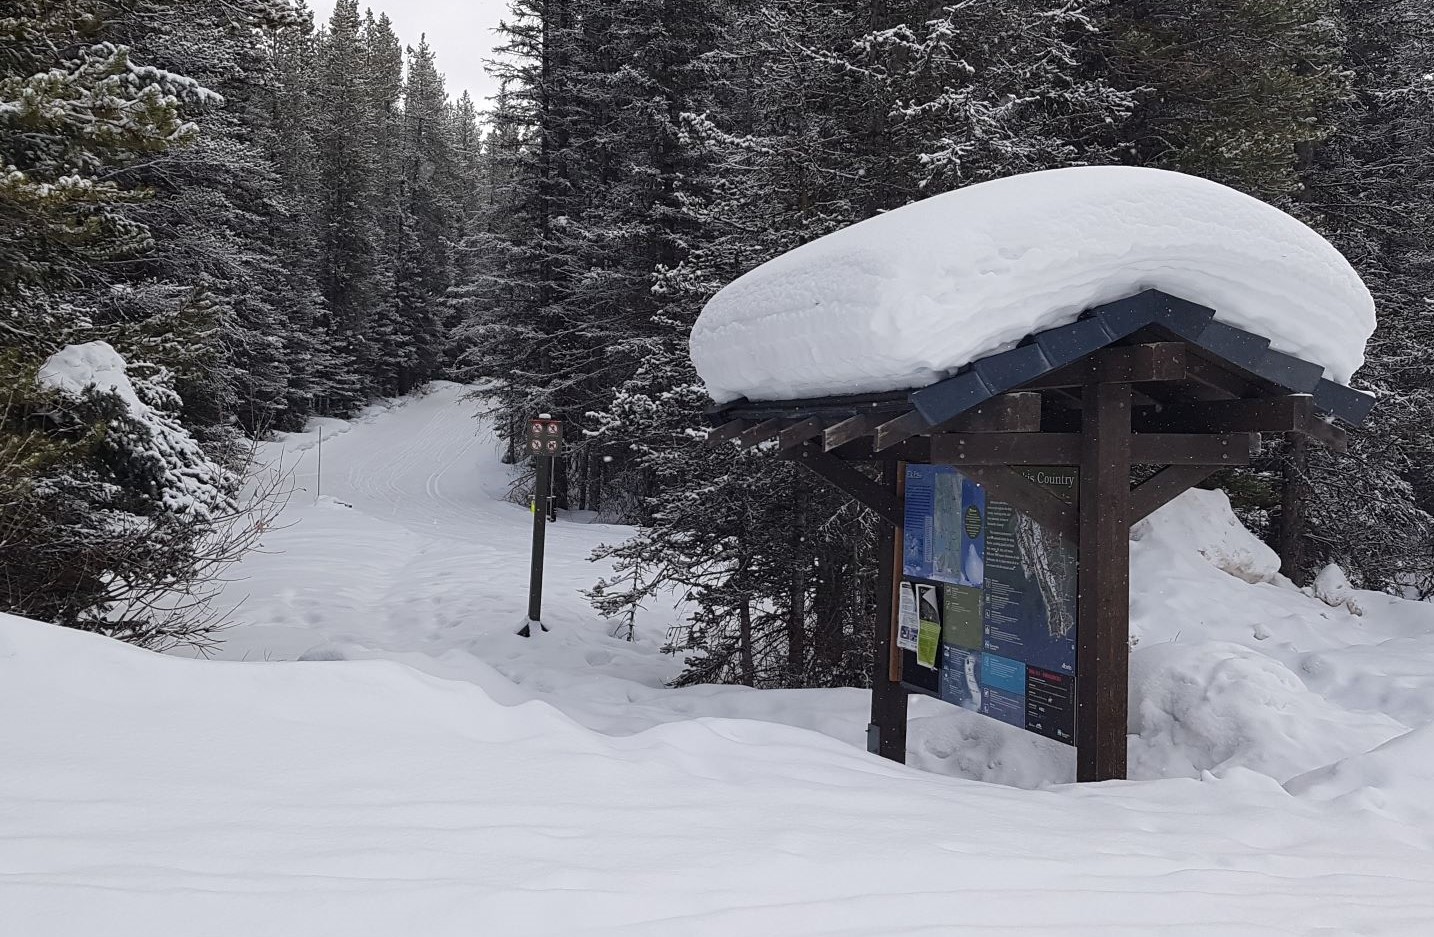
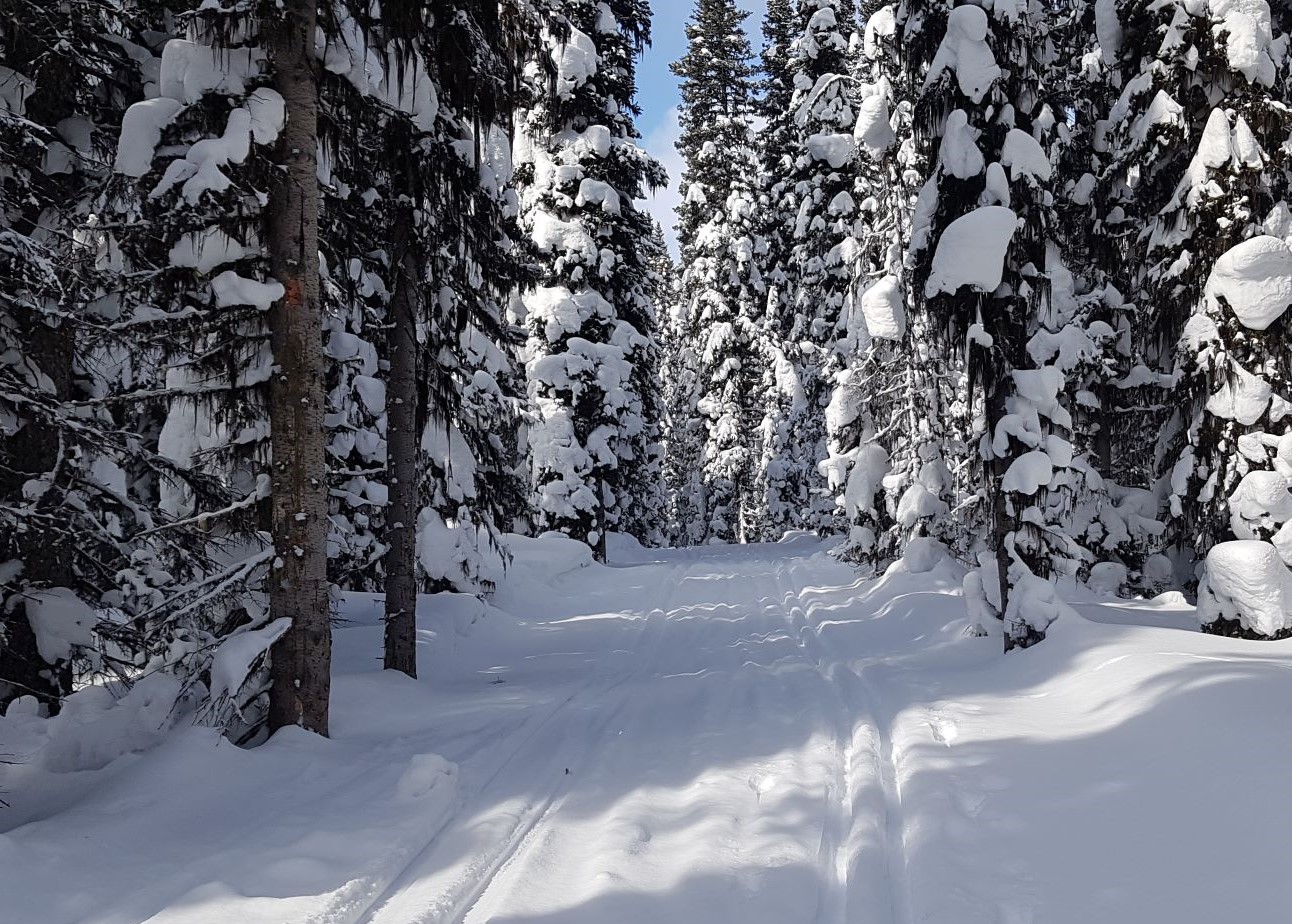
Ski up the only track beside the signage. You will begin to climb almost immediately. Go slow to start, as this hill does not give up.
Main Trail
After a few hundred metres is the first turn off form the main trail. This is a multi-purpose trail for walkers and fat bikers.
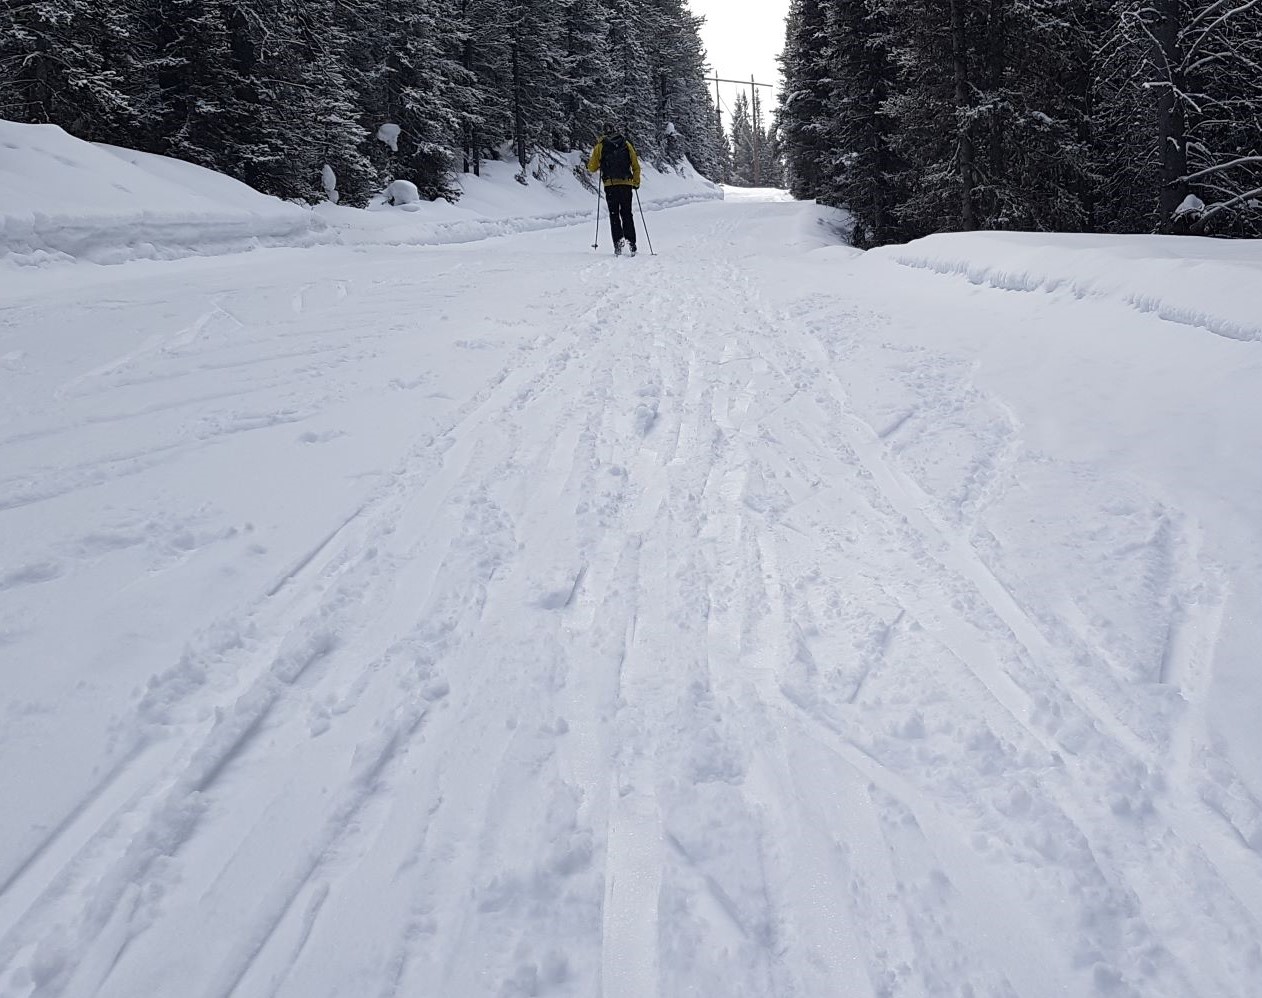
Keep climbing the hill. This is a great way to check your wax. If you can walk up most of the way, you’ve got the right wax. If you are sliding backwards or need to herring bone most of the way, then you might want to consider changing your wax. There is enough uphill on this trip to make the most of your wax.
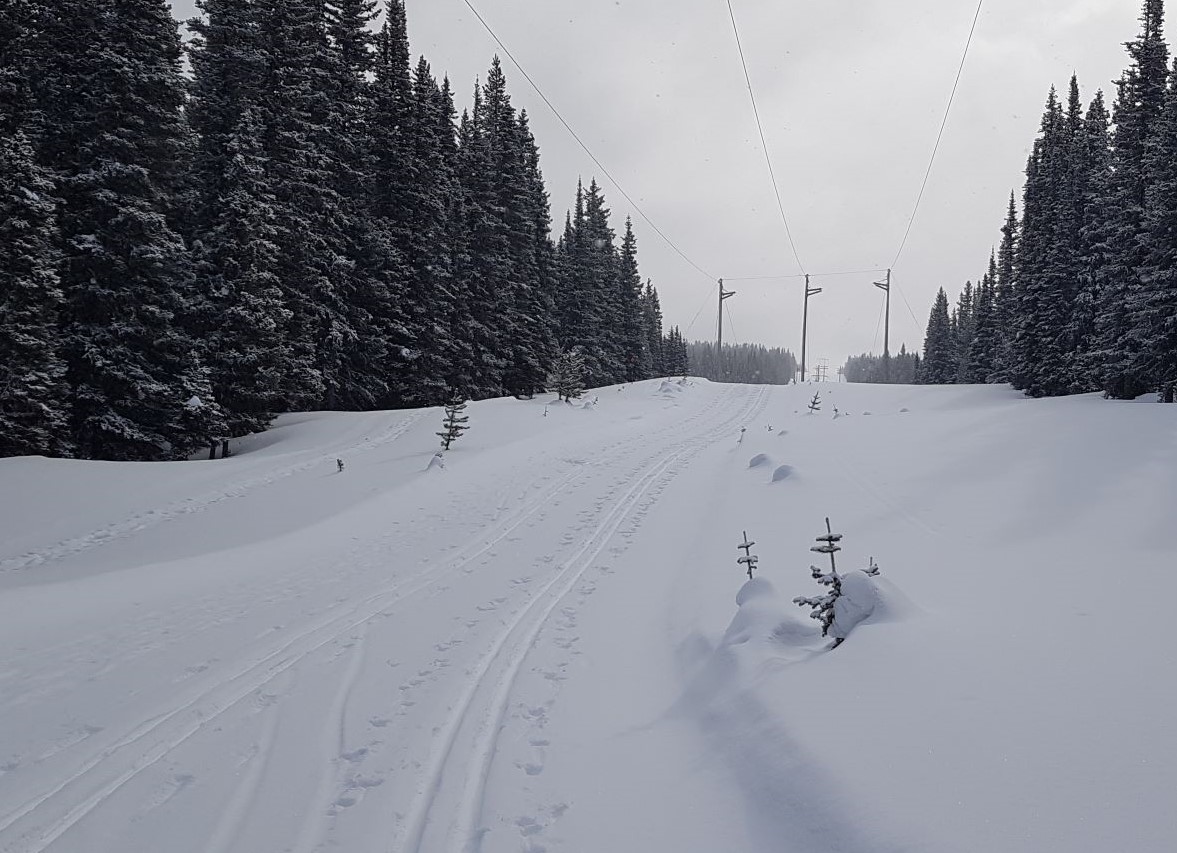
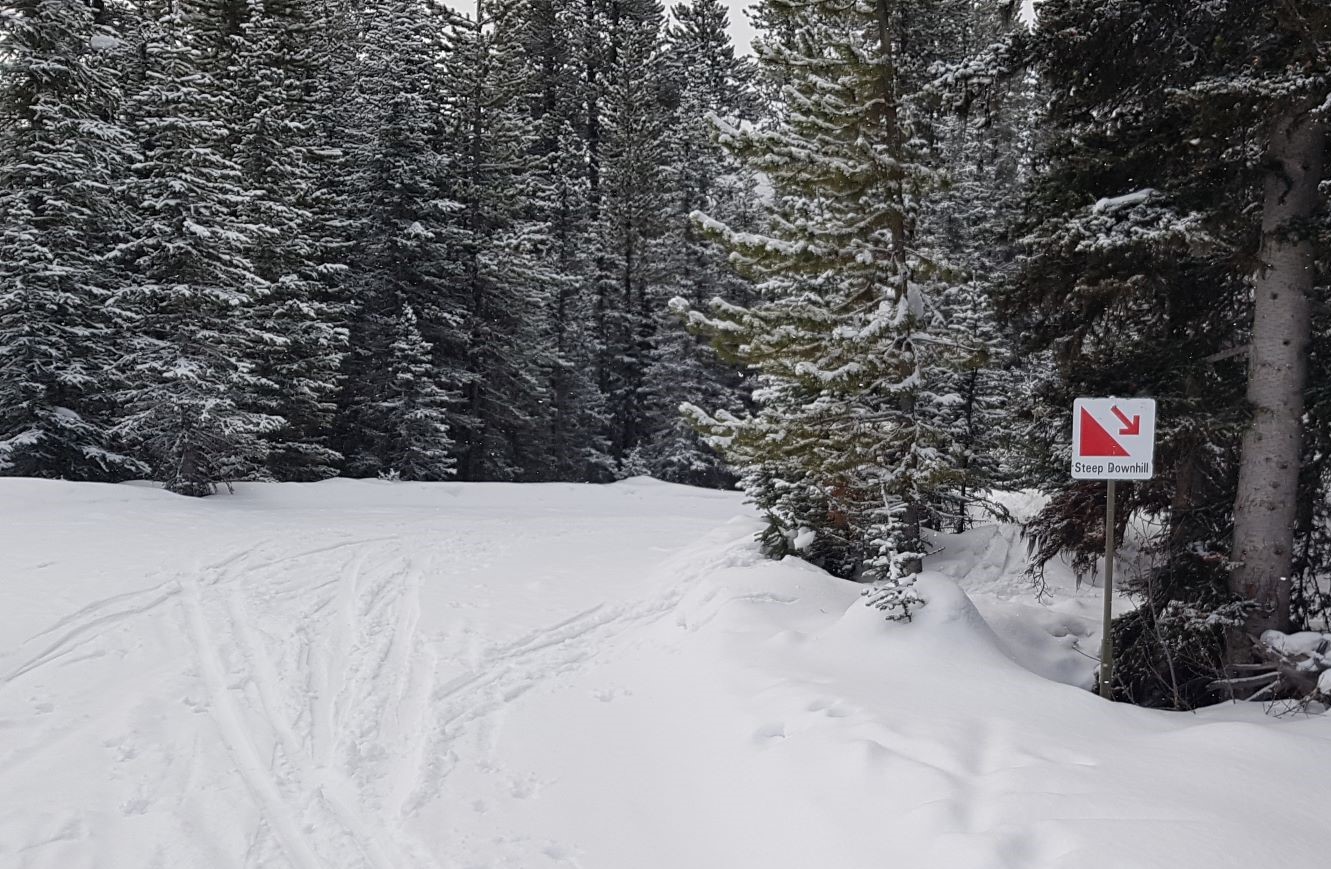
When you can see the power lines, you are almost there. It gets even steeper near the top, so herring bone is an option, as well as using the wide slope to start doing your own switch-backs. Downhills skiers can see you before they rocket down here, so just keep your head up.
At the top of the hill, about 1 km from the parking lot, follow the trail as it veers left under the power lines.
Soon, you will come to the top of your first downhill. Follow this down to the right, picking up as much speed as you can to propel you forward at the bottom, getting ready for the gradual uphill to come.
Once at the bottom of the hill, continue straight until you come to the first T Intersection, about 1.5 km from the trail head. Turn Right.
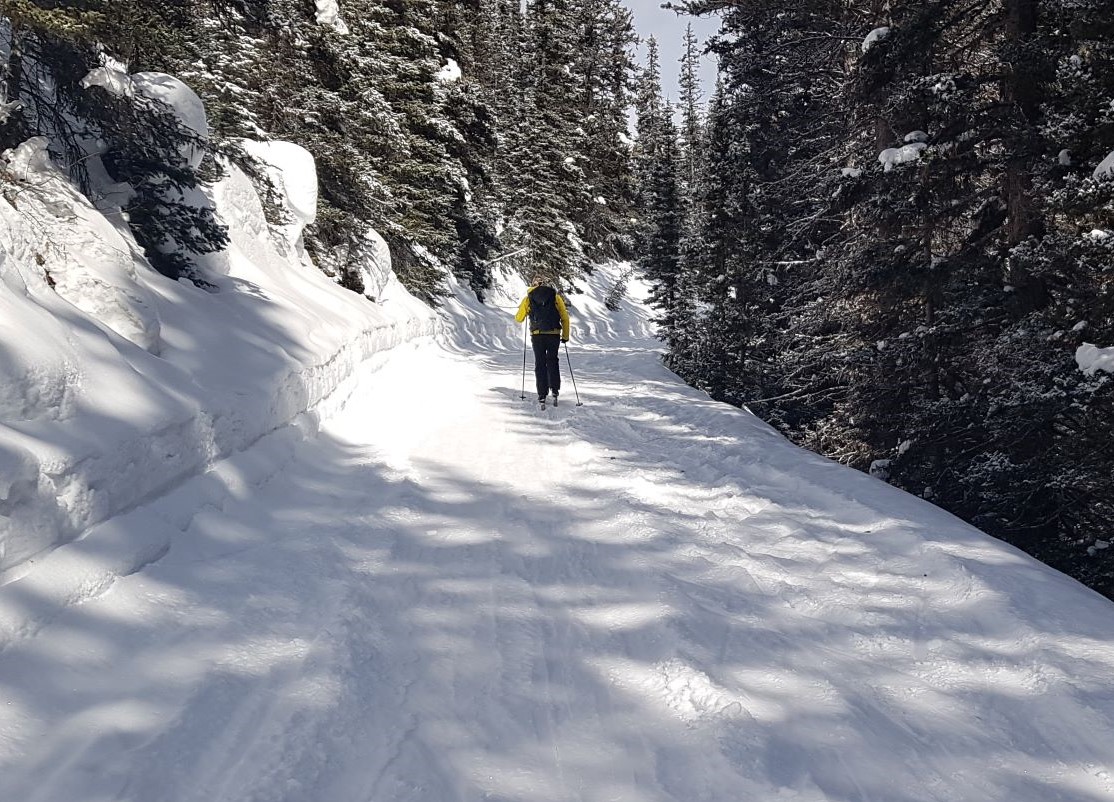
From here, you will travel for just over 2 km, following the creek on the right. You will cross a few bridges, but depending on the depth of the snow, you may not even notice them, so I am not using them as landmarks.
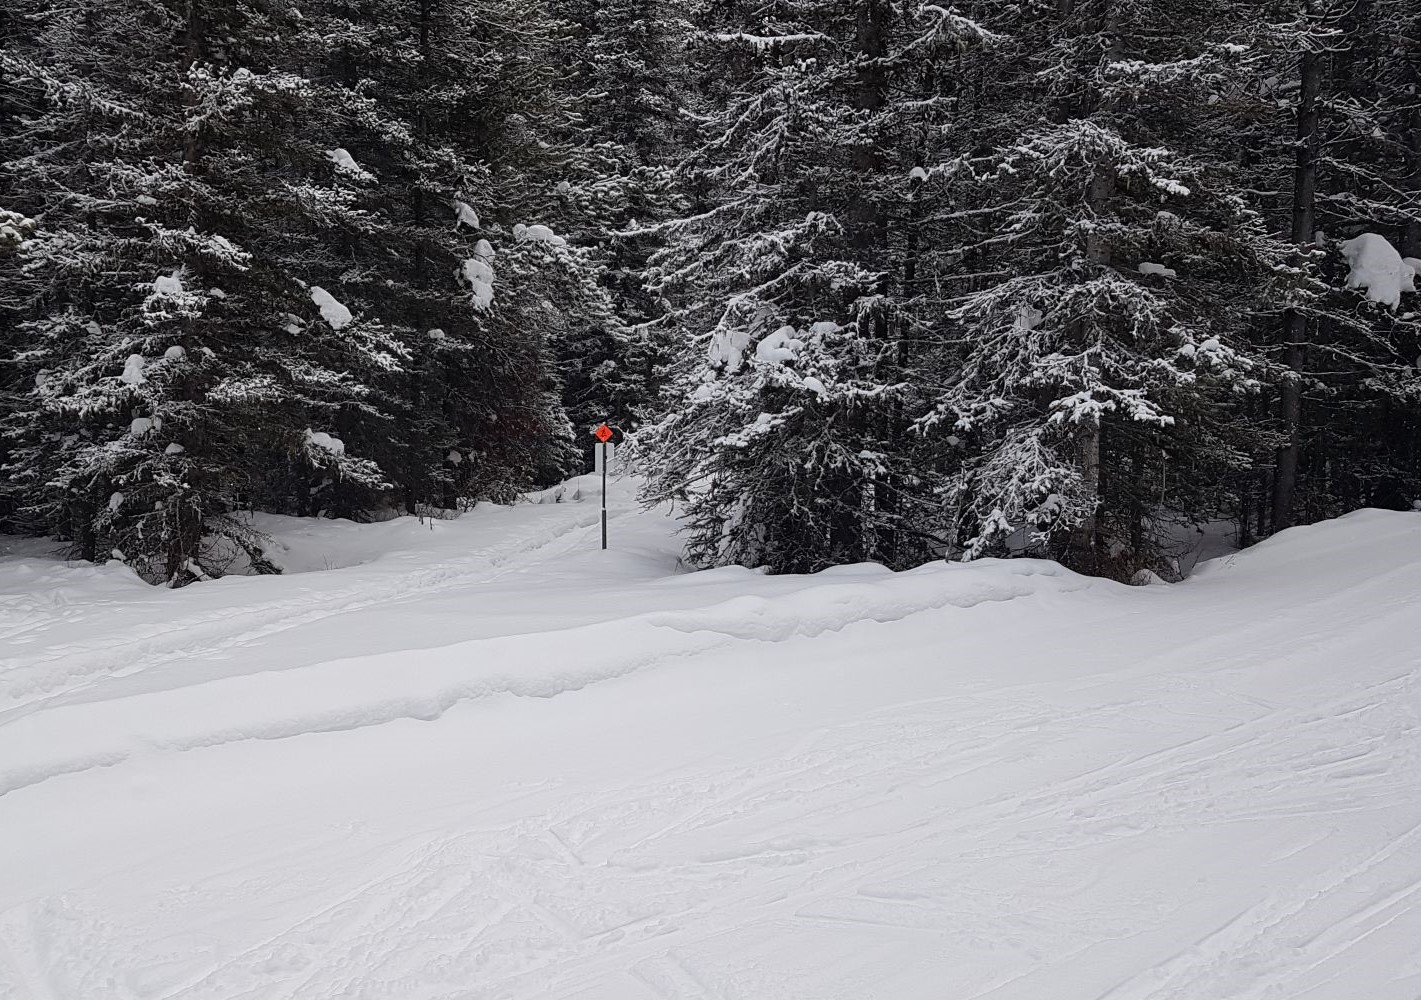
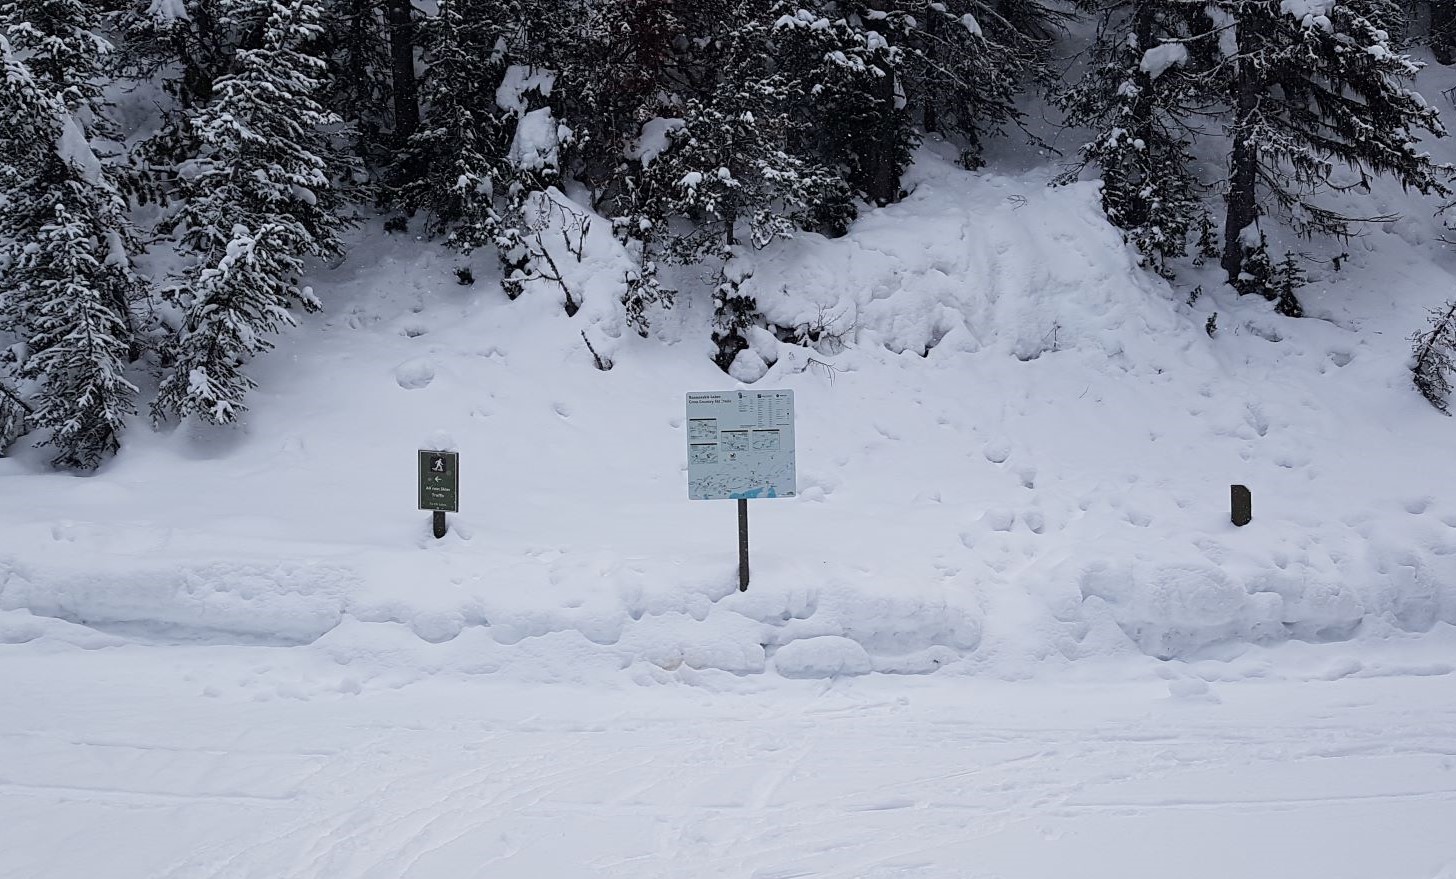
At the second of three T Intersections, again turn Right.
Behind the sign you can see where people have traveled straight. I recommend this as a shortcut on the way back down. Going up can be a right pain because it’s steeper than it looks, and also not wide enough to do a good solid herring bone.
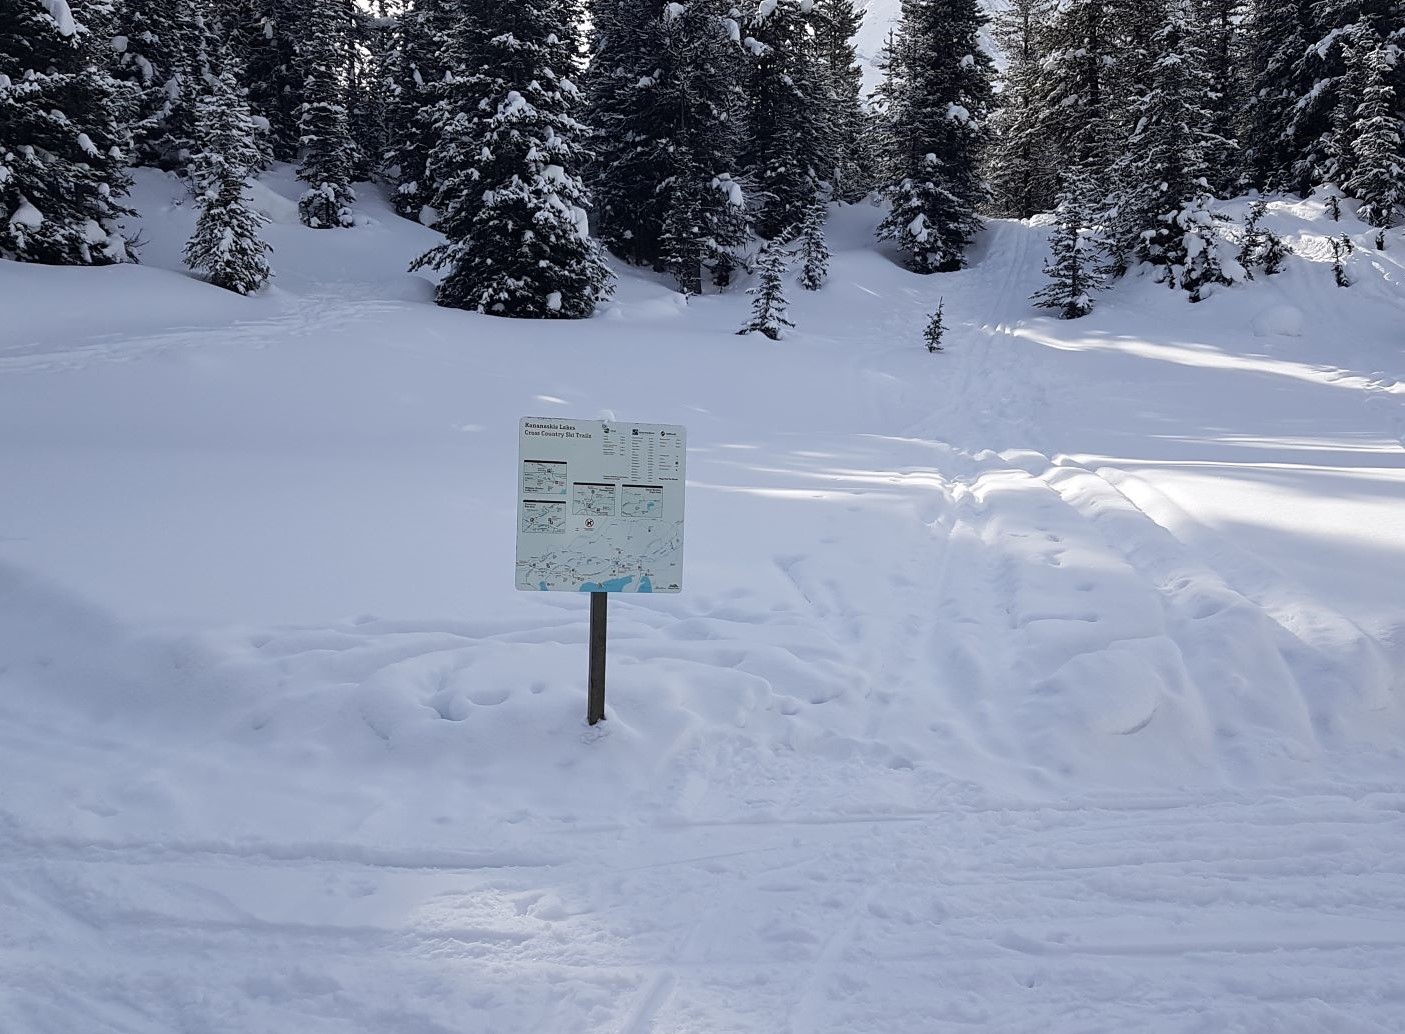
From the sign, you go right to make a big looping semicircle for about 200 m. You have now arrived at the picnic table, and the third T intersection.
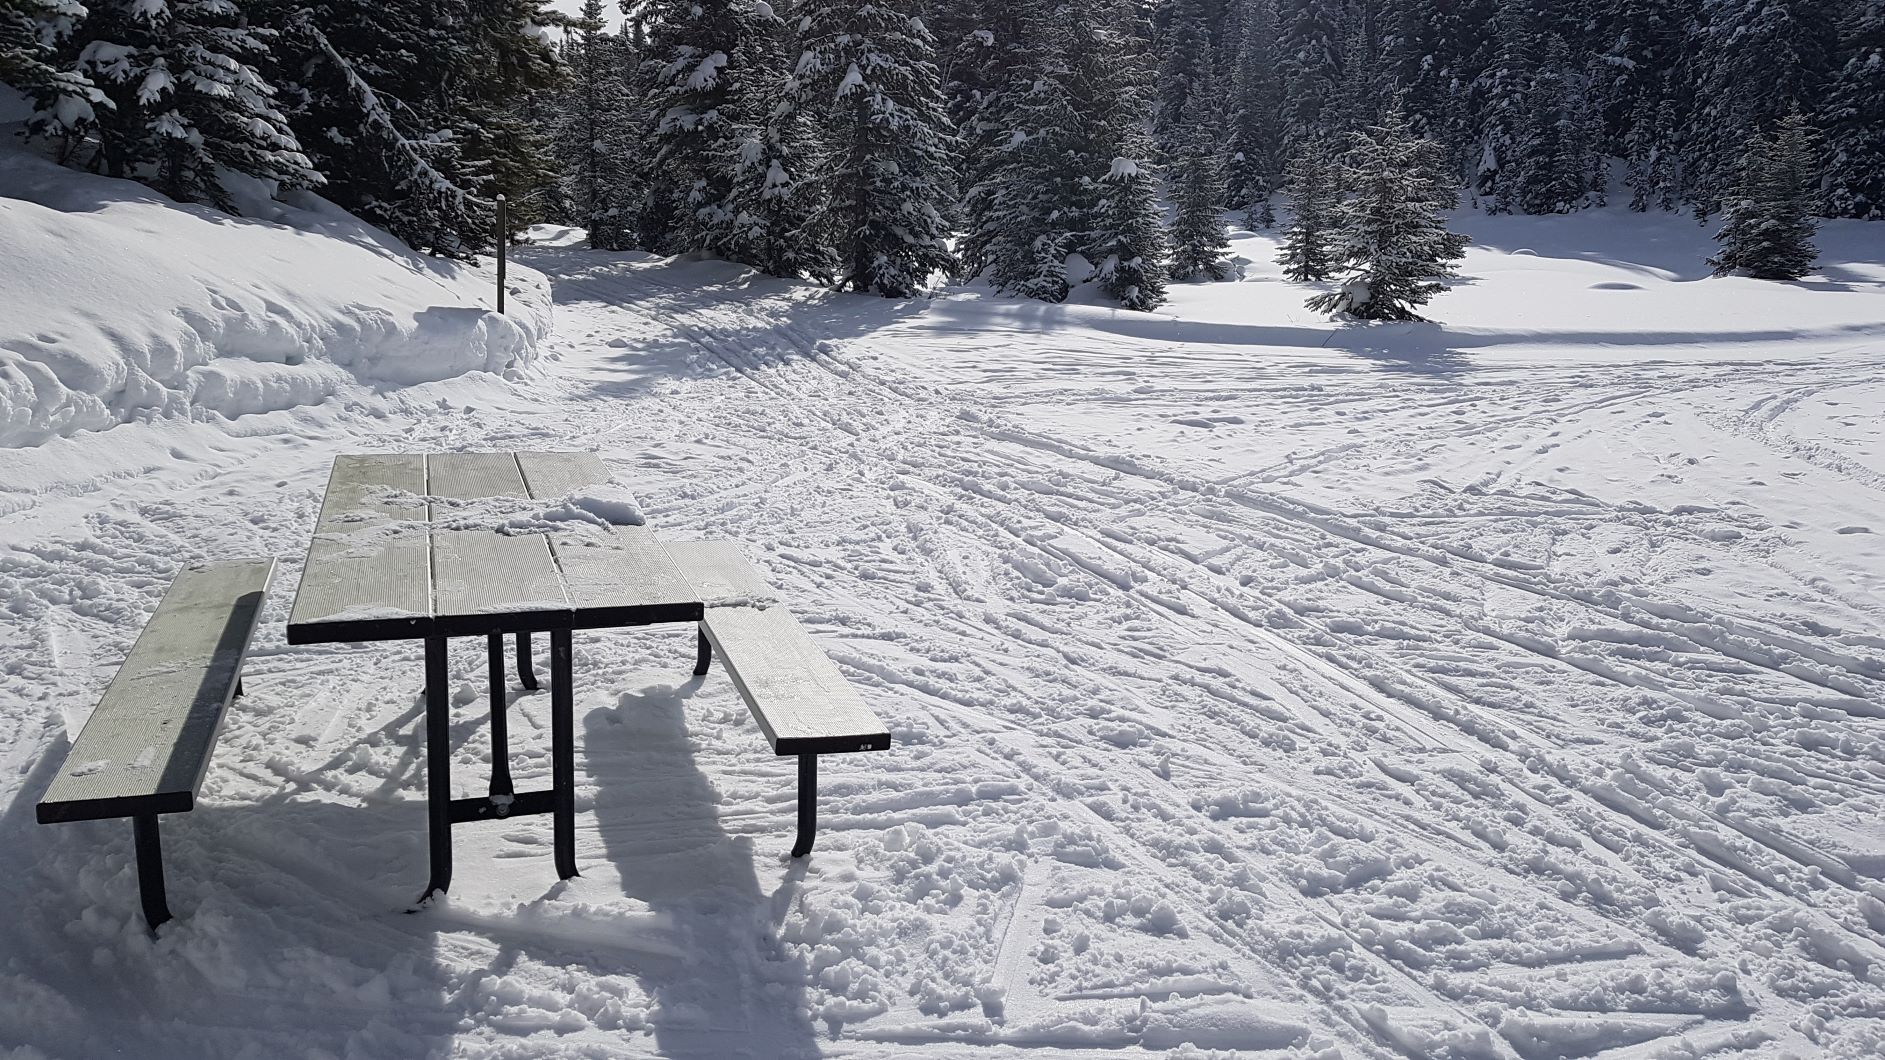
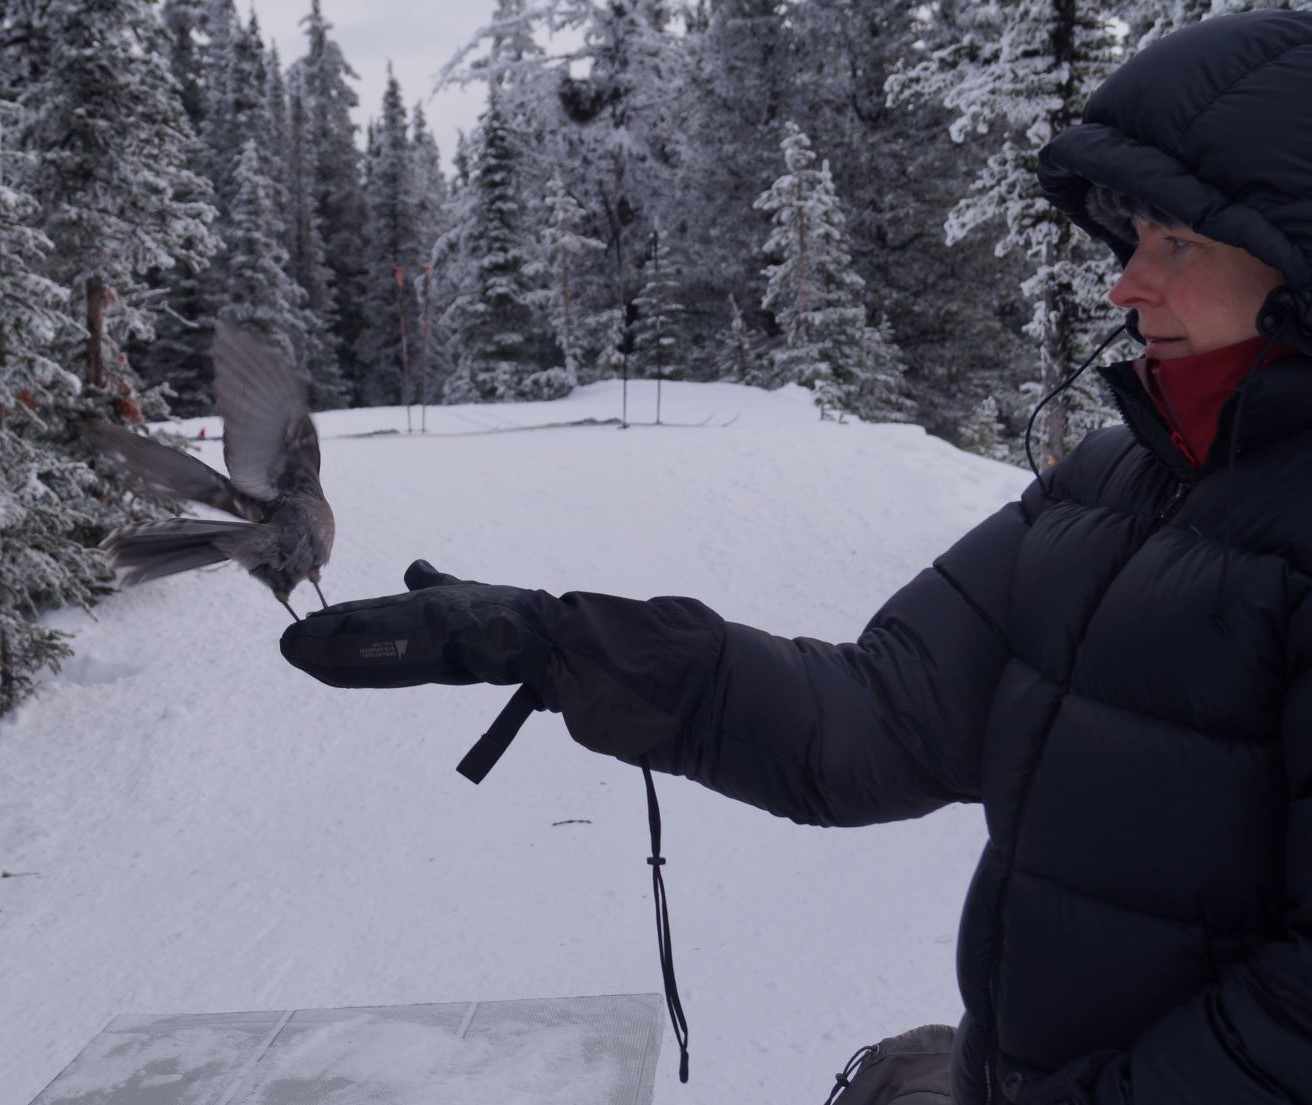
This is the ideal spot to recharge. Have a drink and a snack before you tackle the final push up to Blueberry Hill. Be aware of the Whiskeyjack (Grey Jay) birds who will quite happily snatch the lunch right out of your hands.
From the picnic table, turn Right. This is the third and final right hand turn. From here, simply follow the trail for 3 km until you reach the end.
While it will be tempting to use both tracks on the way up so you can chat, be aware of downhill skiers. They have the right of way and you must get out of their way immediately. Sometimes the down track is very slick, and not everyone has the skiing ability to avoid oncoming skiers.
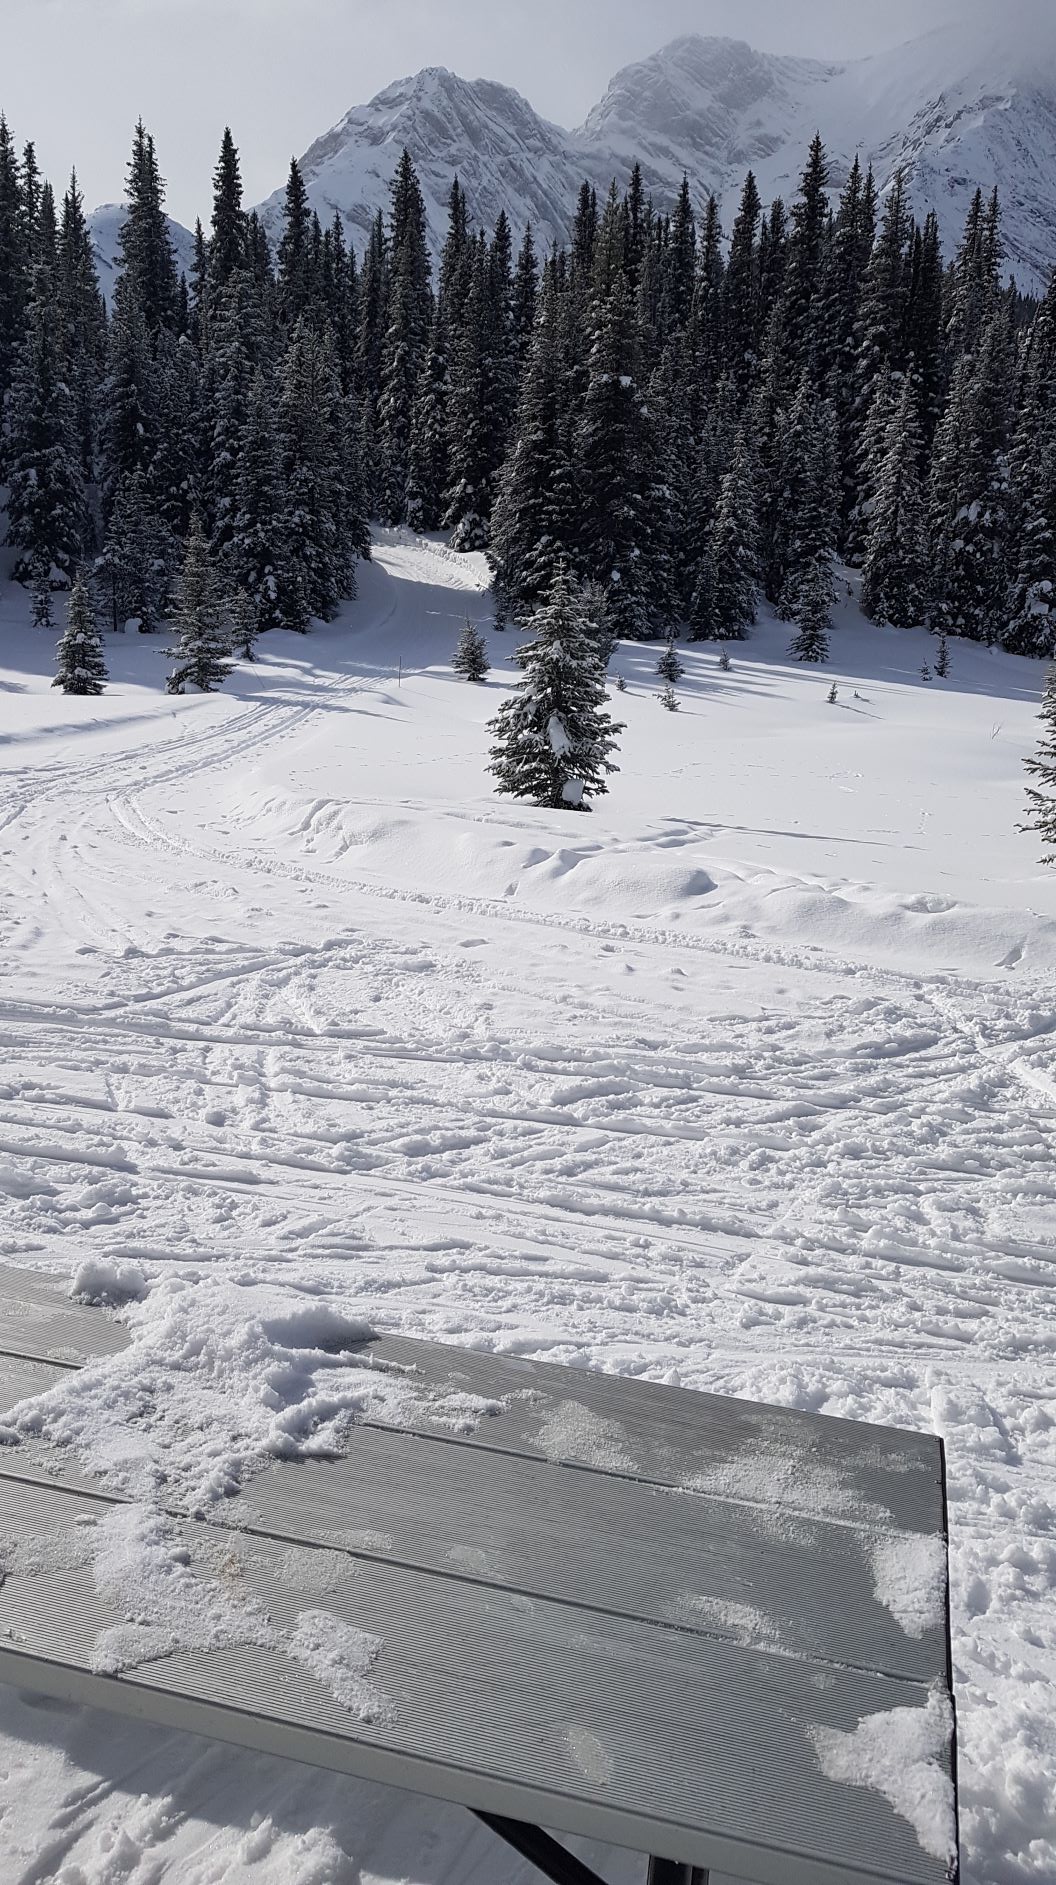
I have done this trail so many times, but it feels different each time. Sometimes I fly up it, and sometimes it feels like it will never end. Sometimes it feels more uphill, and other times it feels quite flat. You know you are nearing the end when you come to a series of undulating dips and climbs. Then magically, the picnic table and (hopefully) the view reveals itself.
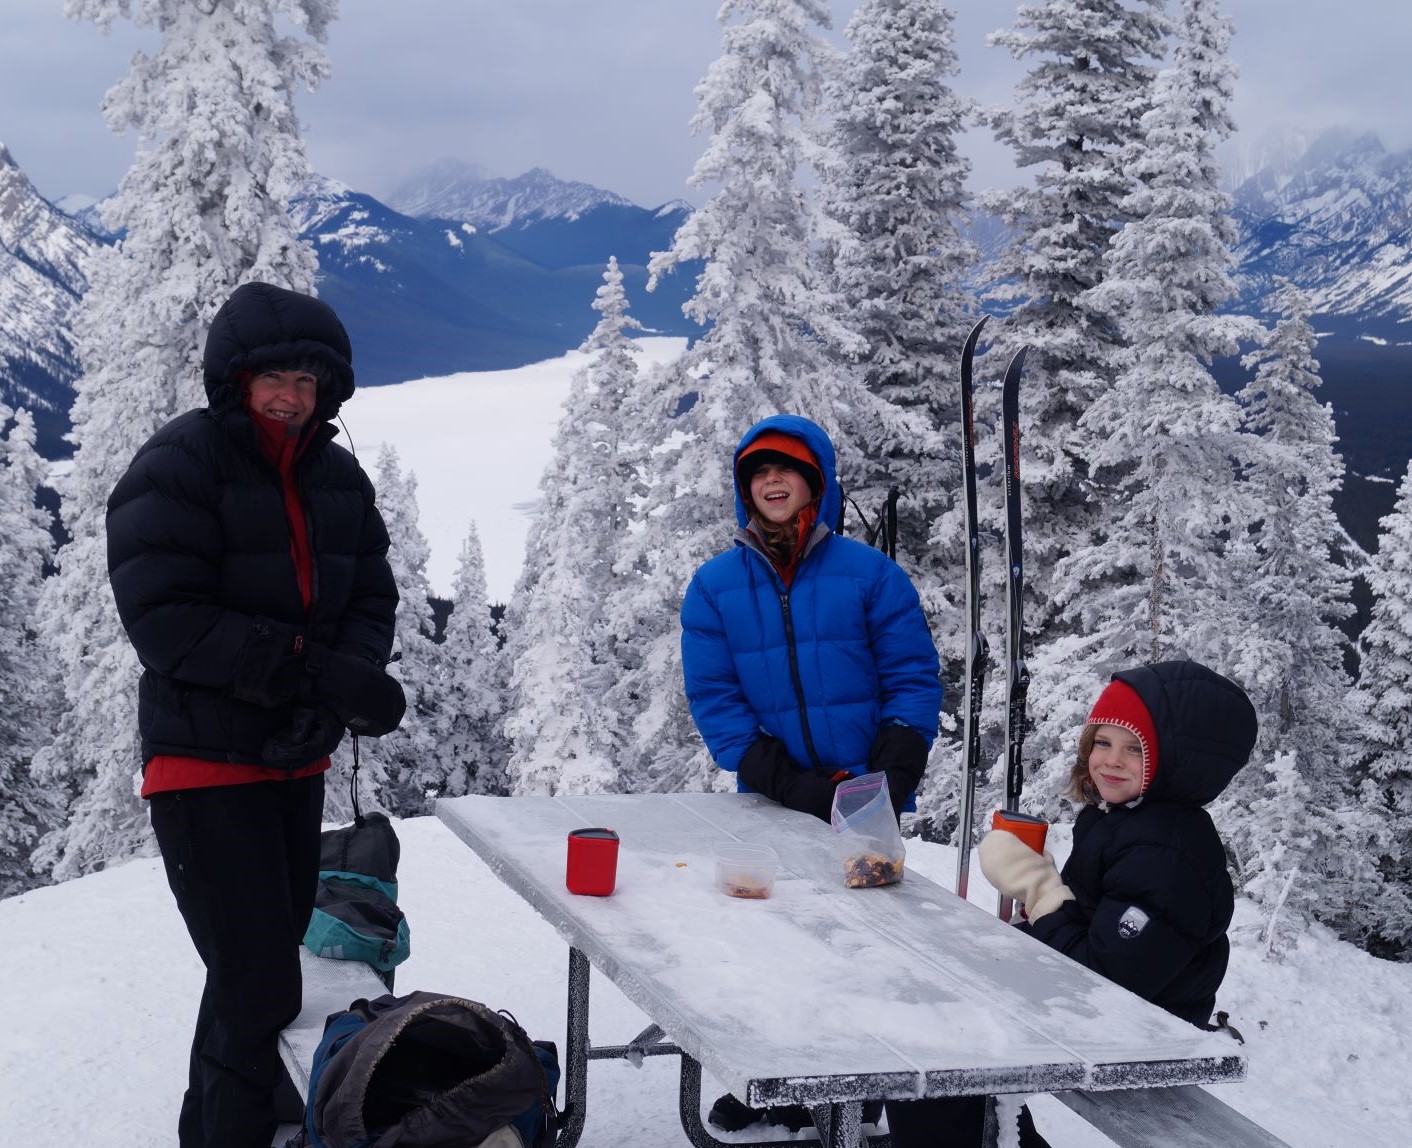
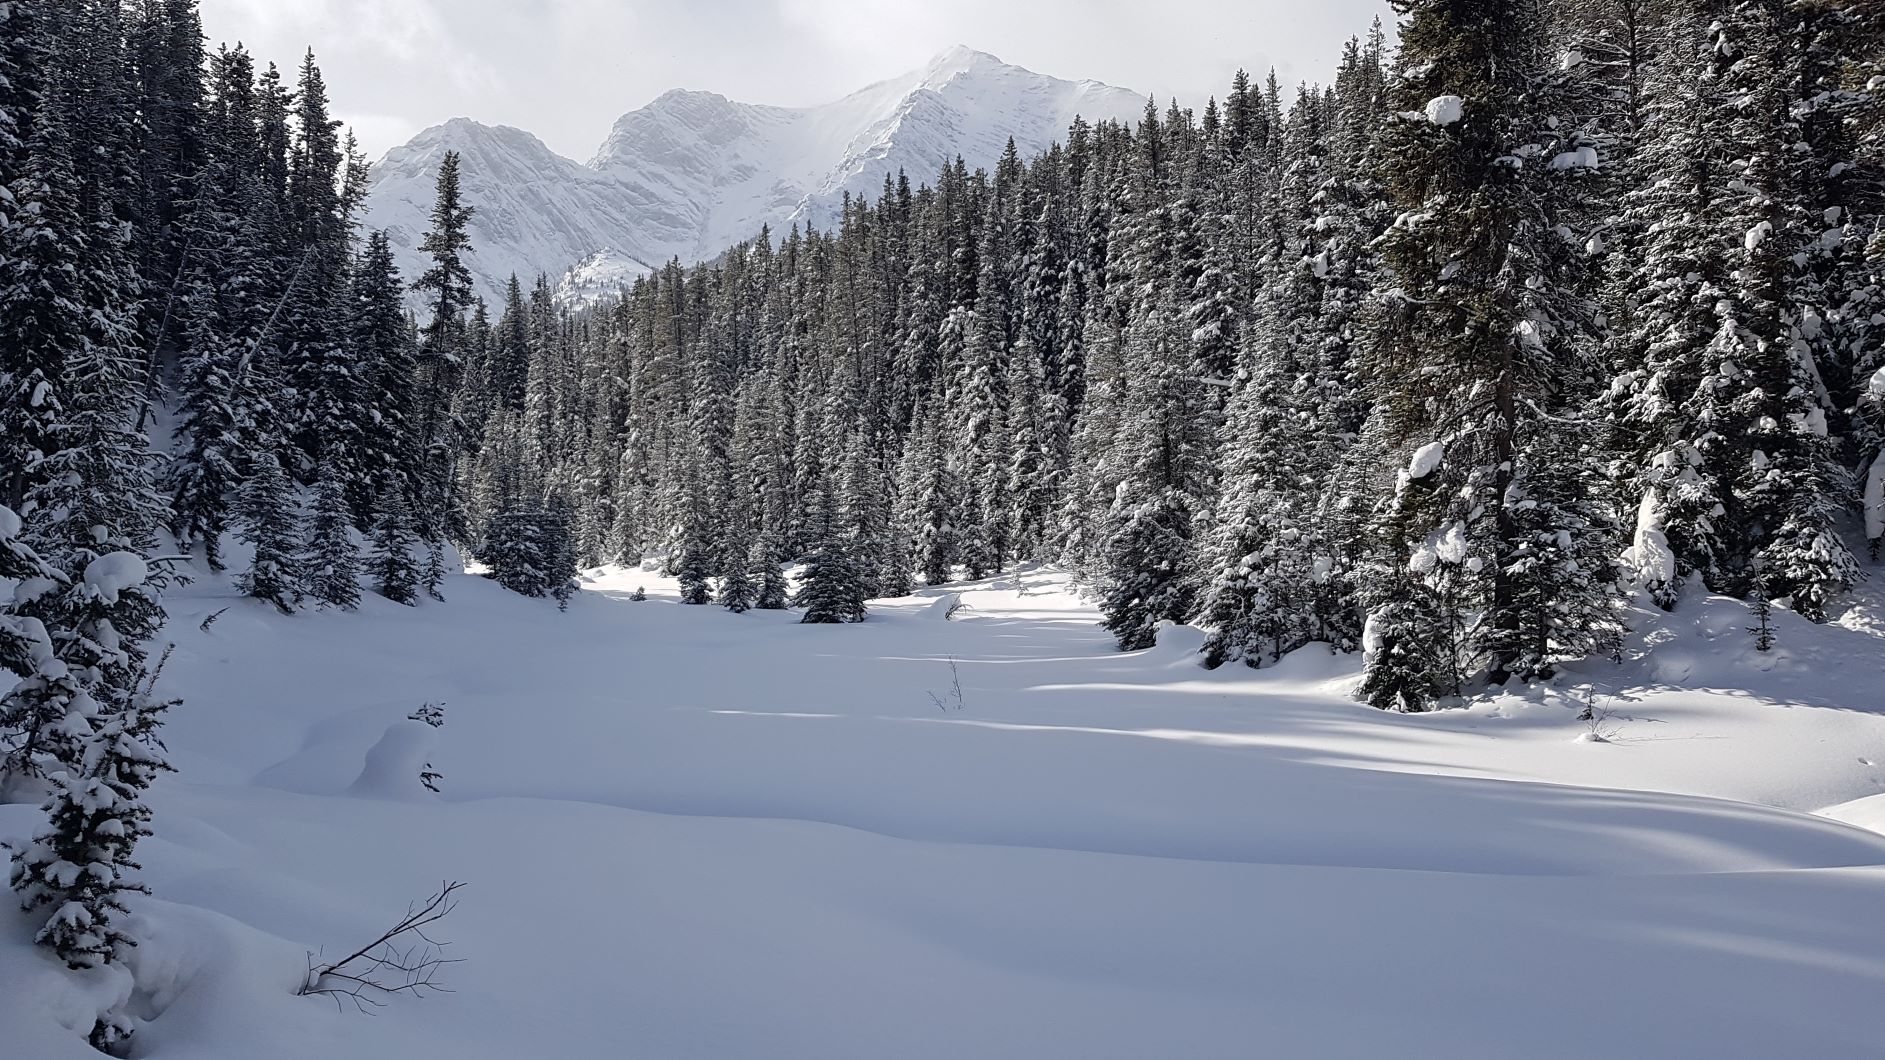
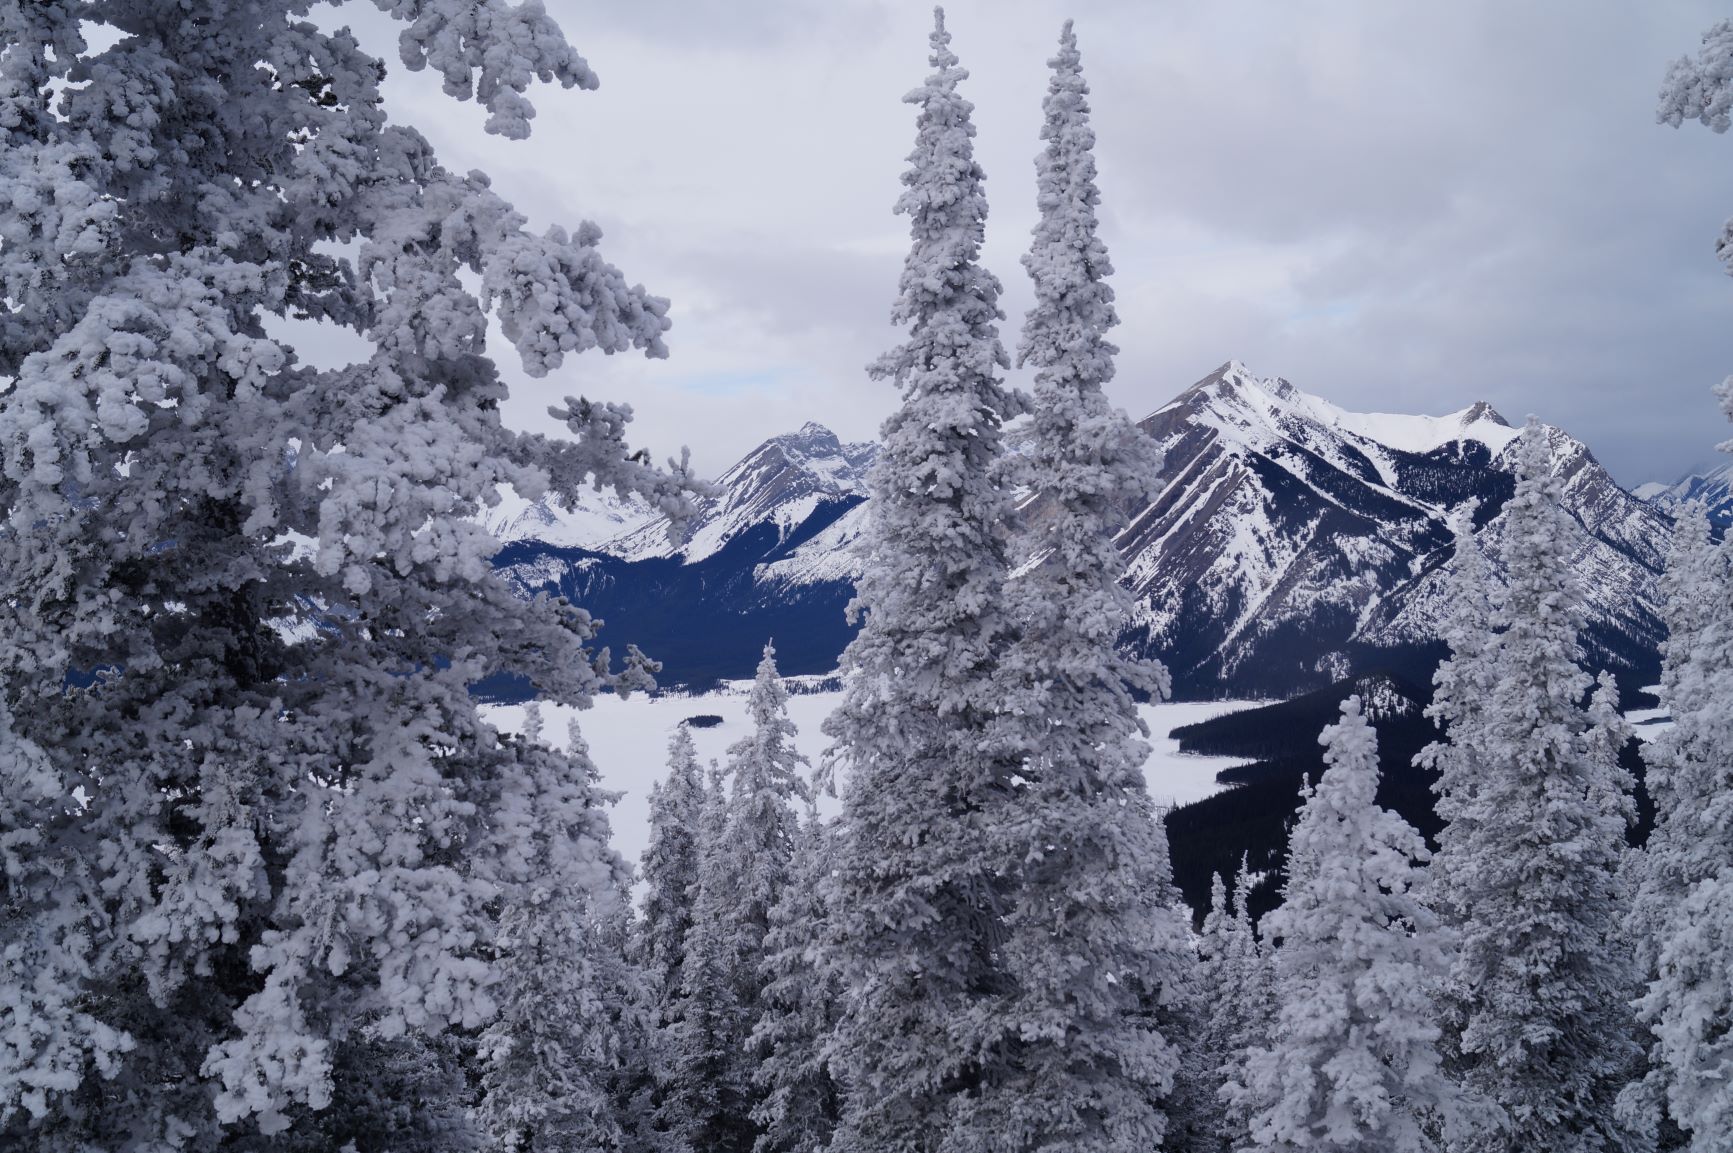
Here you get an amazing view of Kananaskis Lakes, and across to Mount Indefatigable.
A word about clothing. I’ve been frozen solid up here more times than not. Even though I work up a sweat getting here, it seems to be a cold sink. Always carry warm, dry clothes, especially because it’s more or less downhill from here. If you’re not frozen after eating a snack, you will be by the time you get back to the first picnic table.
Blueberry Hill Return
Retrace your path back down Blueberry Hill.
Once back at the first picnic table, you can either go Left to retrace your steps back the way you came up, or you can go right and head for Elk Pass. I will cover the Elk Pass route in a separate trip report. For this trip, assume you retrace your steps.
It is all pretty much a gradual downhill from the picnic table, except for the one notable climb near the end (this is the big downhill at the start). I always dread this climb, but once I’m half way up I realize it’s not as bad as it looks.
Once at the top of the hill, follow the trail around to the left for about 100 m. You are now at the top of the first big hill that takes you all the way back to the parking lot. Depending on how you ski, this can be a really fast descent. I usually put on a toque and bundle up a bit so I stay warm on the way down.
I hope you enjoyed the trip up to Blueberry Hill. It’s definitely a classic winter ski tour in Kananaskis, one that can be done many times over.
If you found this post useful, please do me a huge favour and click the Star button to “Like” it. You can also follow my blog, or join my facebook page Al’s Adventurers.
Alisen
Totals – Tracked on Strava
Date: February 24, 2020
Group: Two (Alisen & Mike)
Distance: 15.8 km
Elevation: 367 m (1,213′)
Time: 2 hours 30 minutes, plus 30 minutes for snacks and lunch
I love all things mountains! I live next door to the Canadian Rocky Mountains, however I travel the world to enjoy the many different mountain environments and cultures that I can. I hope you enjoy these trip reports, and that it inspires you to accomplish your own adventure goals.

you have 1 helluva family! your kids are lucky for having an awesome mom like you!
You are too kind!!! I see that you have a young family. Congratulations! Whatever it is that you love doing, keep doing it with your kids. They will grow up loving it too.