July 7, 2021
Stanley Glacier is a popular stop in Kootenay National Park, just off Highway 93 heading south to Radium. While hundreds start out on the long switchback trail, very few get up to the actual glacier. If a tourist wants to see a glacier, I always recommend they instead head north to the Icefields Parkway as the Columbia Icefield is much more accessible.
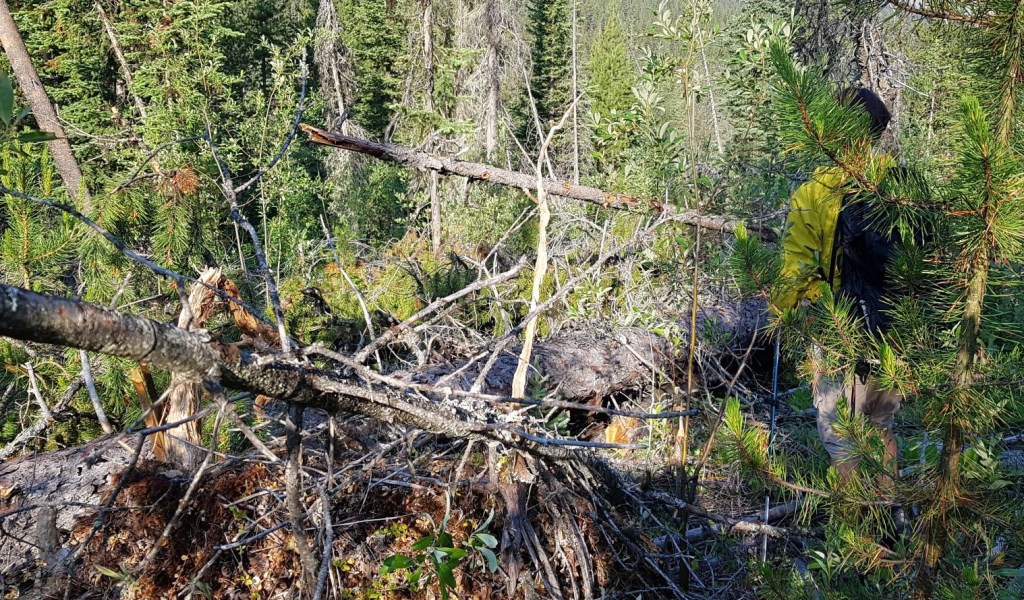
Back-up plans are always a good idea. Having a back-up to the back-up plan is even better. I was originally eyeing Vermillion Peak, but when I realized I didn’t have my climbing helmet, I decided I didn’t want to tackle that knife edge without minimal protection. I then looked next door to Mt. Haffner. I should have clued in when the only trip reports I could find were in winter. There was no trail, and after bushwhacking through an alder infestation and a deadfall quagmire, all I had to show for it were some pretty good cuts and scrapes, and two wasp stings.
Off to my third choice – Stanley Glacier! This is when a good alpine start comes in handy. I’d already driven a few hours, lost an hour on Haffner, but we still got going on this hike by 8:45 am. Not too shabby!
Stanley Glacier, like Leve C Cirque in Banff, is three kinds of Pick Your Own Adventure. Option 1 – hike to the end of the Official Trail. Option 2 – hike up the unofficial trail to the Stanley Creek Meadow above the headwall. Option 3 – hike up the moraine to touch the glacier.
Gear
Depends on how far you are going. For Options 1 & 2, hiking boots, poles and regular day pack kit.
For Option 3, hiking boots with good grip, poles, and regular day pack kit. I would also recommend a helmet because there is rockfall from the glacier above.
Overview
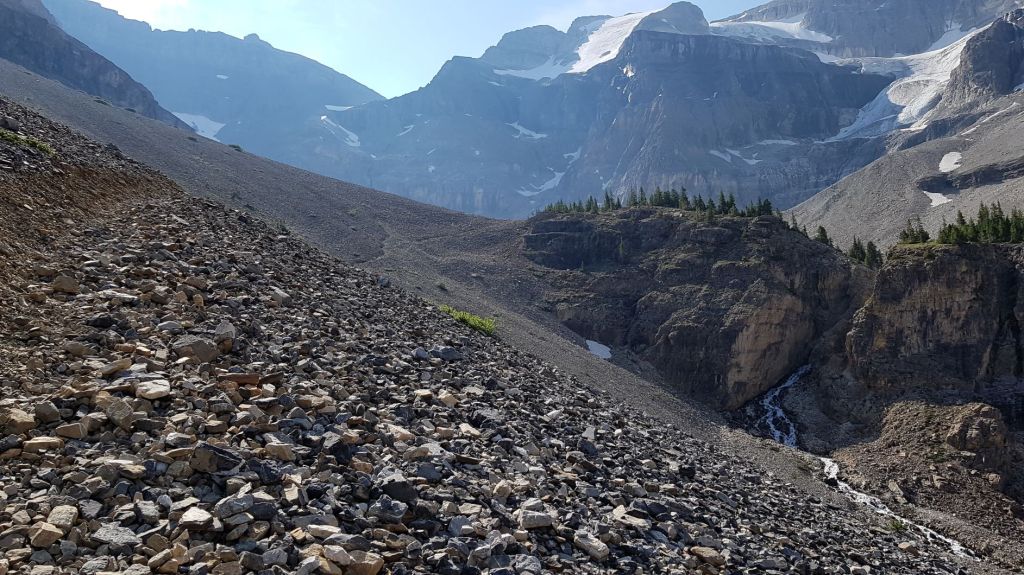
From the parking lot, pick up the trailhead and follow the trail to the end point. The sign will say “end of official trail”. If you want Option 2, then go left and pick you way through the rock piles until you gain the open area above the headwall. For Option 3, once above the headwall, go right to pick up the base of the moraine. There is a ‘Viewing Rock’ that everyone seemed to stop at. Stay and here, and enjoy the view, or continue up to the base of the glacier. This is constantly moving and calving off. Where I go to may not be there next year. Make your own decisions, and beware of rock fall above the Viewing Rock. Return the way you came for all three options.
Parking and Trail Head
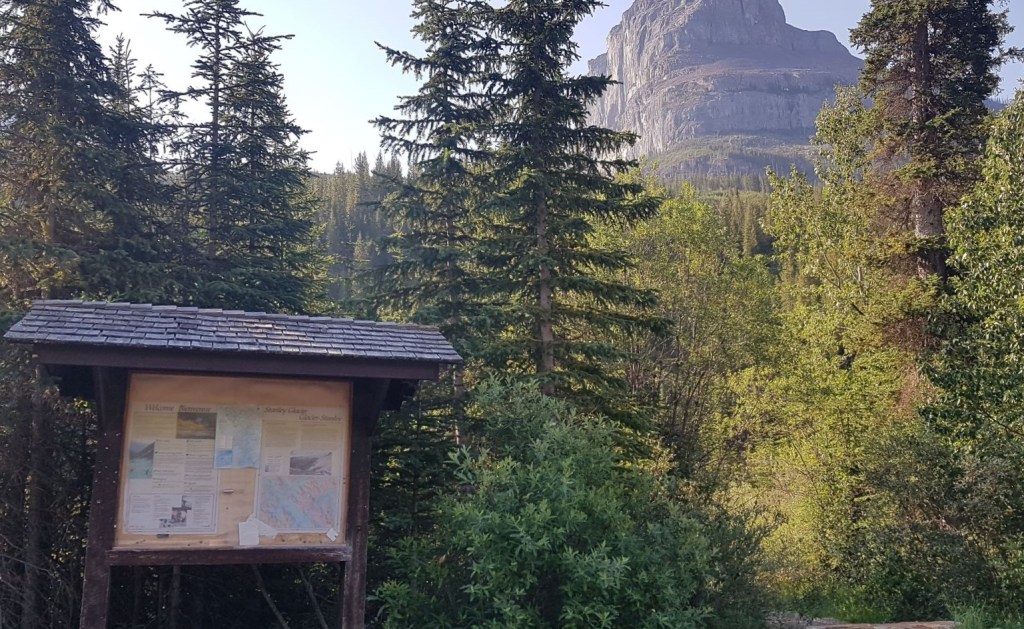
The Stanley Glacier parking lot is on the south side of Highway 93. This area can get congested and busy. Drive with care.
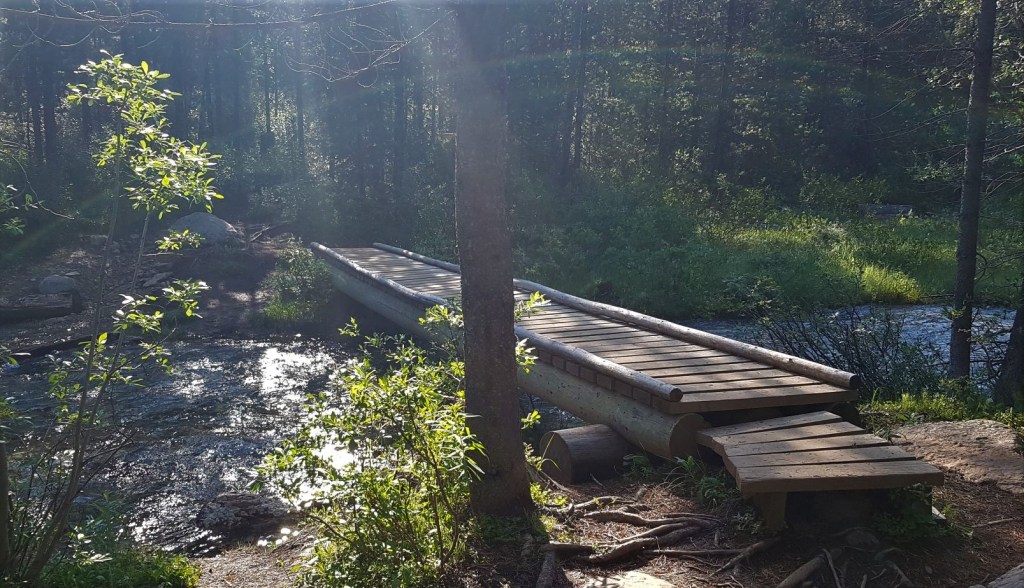
The trail head is at the sign. Head down the trail, where you’ll find a couple of interpretive signs on the way to the Vermillion River bridge.

Main Trail
Once across the bridge, the elevation gain is slow but steady as we hiked along the National Park engineered trail with an abundance of switchbacks. My husband Mike assured me it’s an over-abundance, as it does seem to take forever to gain that elevation. I have to remind him that this is a hike and not a scramble.
To while away the time on the switchbacks, it’s worthwhile to examine the regrown forest. This forest burned in the early 1970s, and as kids we would call it The Black Forest. In 2003 when my daughters were 18 months old, the forest burned again in a massive fire. Almost 20 years later, and the forest has regrown amazing well.

At about 2.4 km, we crossed Stanley Creek on a little bridge.
There is one short set of rock steps built into the trail. I absolutely adore rock work, but it is very rare.
Above this, the trail turns left at the sign. The trail used to go straight here, but I imagine trail slumping or avalanches took it out.

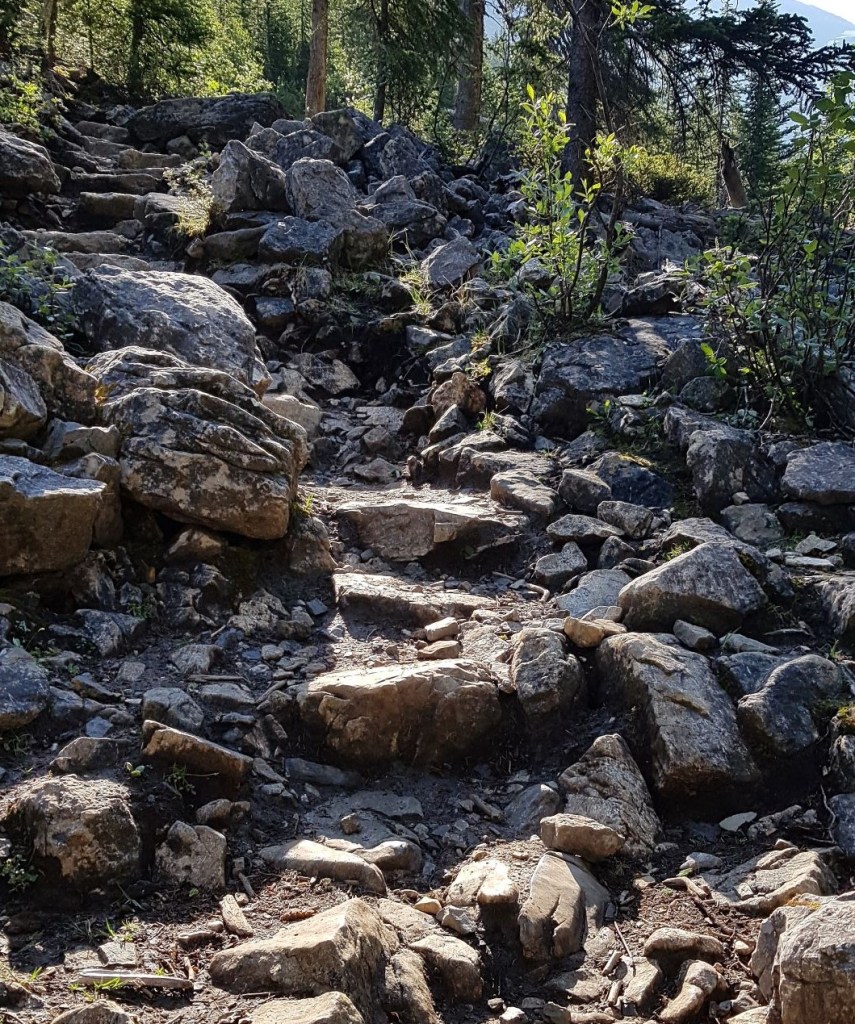
The trail goes through some rubble here. Keep an eye out for flattened rocks to stay on the correct path.
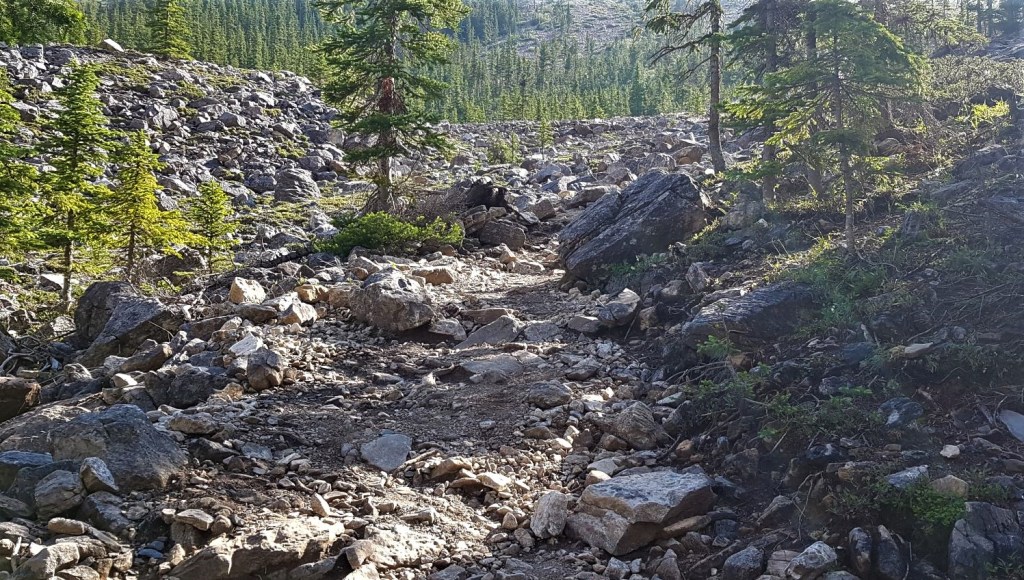
When the switchbacks ended, we were at the top of the rise and could now hike more or less straight ahead, with the giant rock wall of Stanley Peak surrounding us on three sides.

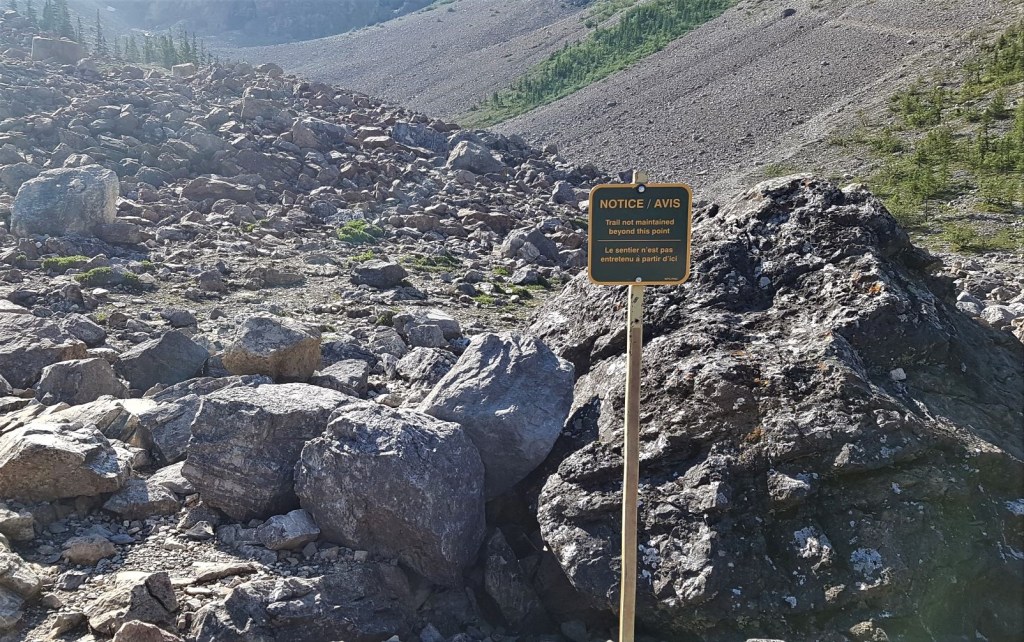
When you reach the “End of Official Trail” sign, this is the end of Option 1. This is a great stopping point if you’re travelling through, or want to stick to a hike. The views from here are fantastic, and don’t change that much if you keep going. There is good fossil hunting here, so keep your eyes peeled while you enjoy your lunch. I know it’s tempting, but please do not take fossils home with you.
Distance to end of Trail Sign is 4.2 km, with an elevation gain of 365 m. Time to this point was one hour 15 minutes.
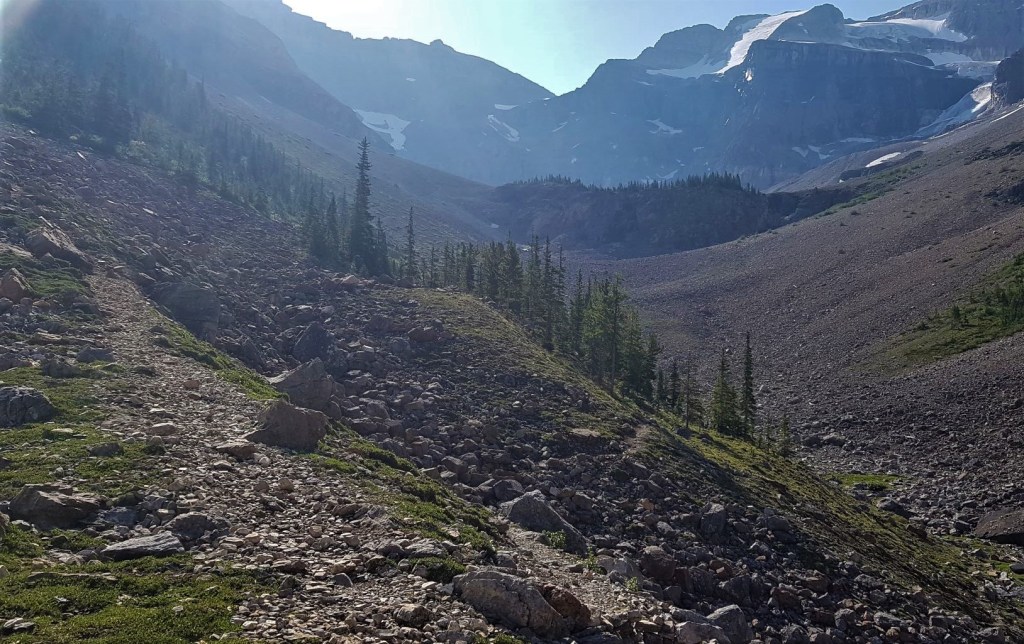
Option 2 – Stanley Creek Lookout
Option 2 now begins. Look for a trail through the rock pile, generally on the left. If you lose the trail, look further up until you spy it, and then head in that direction. The closer you get to the headwall, the better it is.
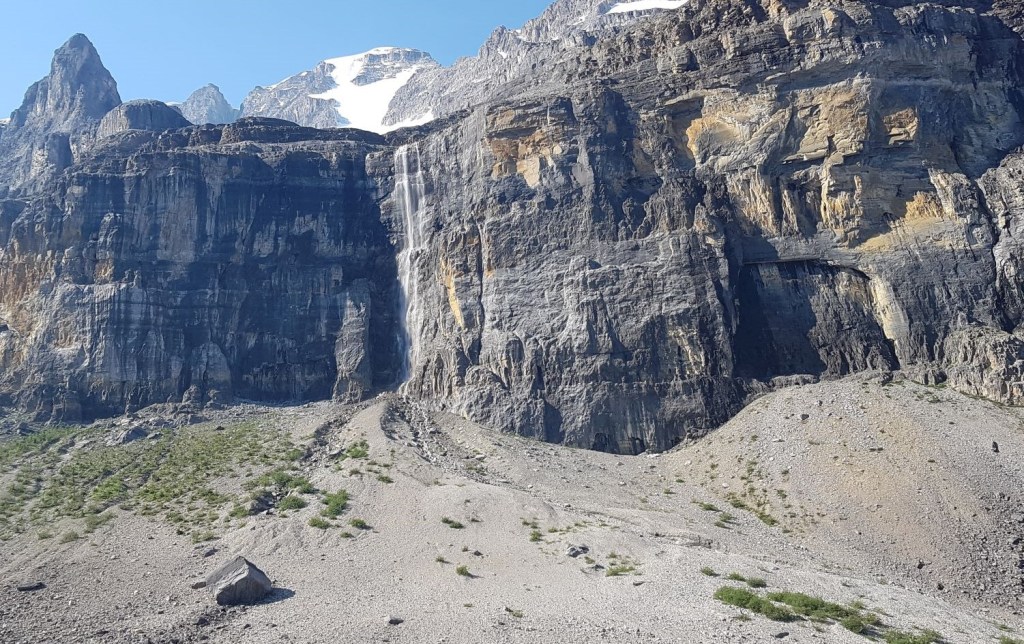
There are trails on the right side too, that lead over to the rock wall. There were several groups over there, having fun with the waterfall and trying out the echo.
Option 2 ends when you reach the top of the headwall, which is called Stanley Creek Lookout. Instead of finding a cool tarn to sit beside and enjoy our lunch, we came upon a beautiful meadow.
Distance to Stanley Creek Lookout is about 5.6 km, with an elevation gain of about 558 m. Time was one hour and 45 minutes.


Option 3 – Stanley Glacier & Waterfall
Mike had his heart set on the glacier, and without even pausing to take a few photos, off we went to the base of the moraine on the other side of the meadow.
This moraine is like any other – a jumbled up rubble pile of different sized rocks. While there is a trail through here, some parts were fairly steep and dried out. Basically, small ball bearings on cement.

About half way up the moraine is the large flat rock I’m calling the Viewing Rock. On our way up, the group in front stopped there for lunch (and a toke), and on the way down, we saw a different group get to that spot, stop for a bit and then head back down. This is a good place to stop though, as you are seemingly outside the strike zone from the rock fall up above. Still, pay attention.

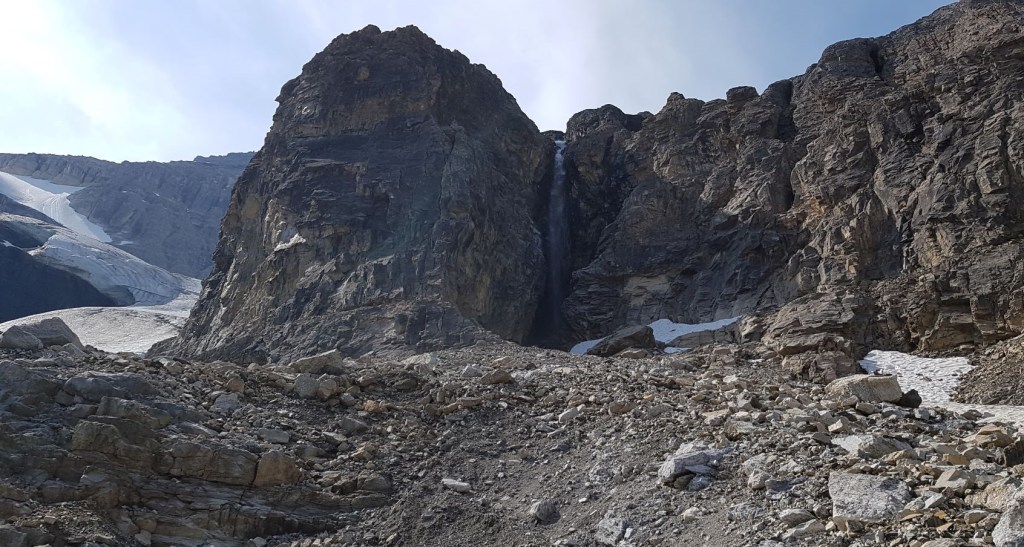
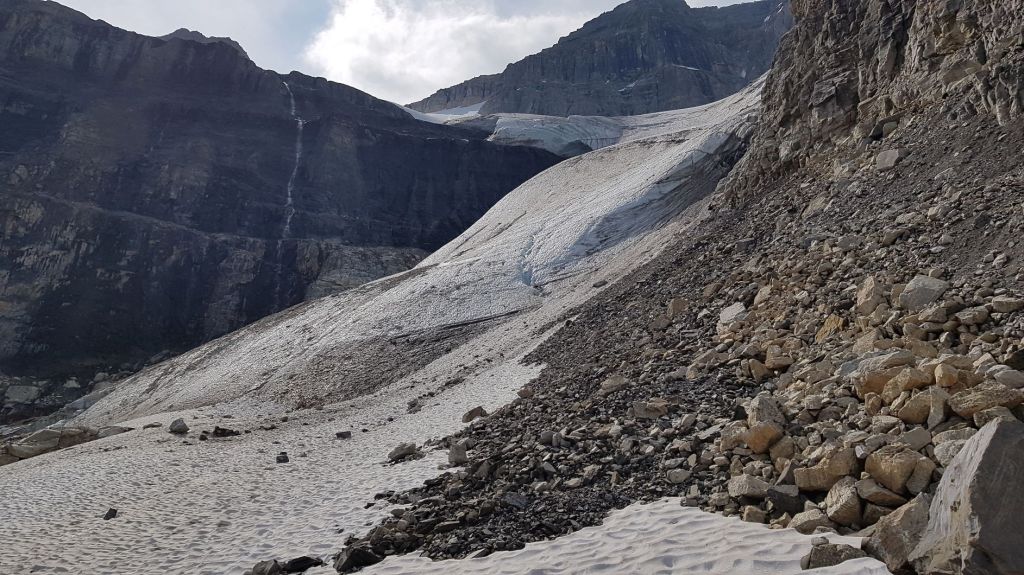
After a delightful spray on a hot day to cool us off, we traversed over to the toe of the Stanley Glacier. After we went back down to the Stanley Creek Lookout, we met a group of 70 somethings. The last time they were up on Stanley, the glacier had a little cave on it (similar to the ice cave above Bow Hut right now). We had to tell them it was gone. Disappointment was felt by us all.
Distance to the waterfall/glacier area is 7.3 km with an elevation difference of 880 m, but a total gain of 1,000 m. Time to waterfall was 2 hours 30 minutes. Add another 15 minutes for gawking, and time to walk over to the glacier. Total time to glacier was 2 hours 45 minutes.
Stanley Glacier Return
As we were in a shooting gallery, we quickly backed away, and hid behind a large boulder as I tightened my boots and put on knee braces for the steep descent. We beetled out of the strike zone as quickly as possible.
For all three Options, this is a There and Back trip. Simply turn around whenever you’ve had enough, and return the way you came.

One of the best parts of Stanley Glacier is Vermillion River right at the start of the trail. After we got back to the car and changed our shoes, we walked back down to the river to cool our aching feet, and wash off the sweat and salt. This is the BEST way to end any day in the mountains. It’s also a huge refresher for the drive back home.

If you found this post useful, please do me a huge favour and click the Star button to “Like” it. You can also follow my blog, follow me on Instagram, or join my FaceBook page Al’s Adventurers.
Alisen
Totals – Tracked on Gaia (Displayed on Strava)
Date: July 7, 2021
Group: Two (Alisen and Mike)
Distance: 14.8 km
Elevation: 1,000 m (3,300′)
Time: 5 hours 15 minutes (includes lunch & breaks)


I love all things mountains! I live next door to the Canadian Rocky Mountains, however I travel the world to enjoy the many different mountain environments and cultures that I can. I hope you enjoy these trip reports, and that it inspires you to accomplish your own adventure goals.

what beautiful places to hike
It truly is. Our National Parks really did protect the best of our mountain environments. The provincial parks are also lovely, but not as spectacular as the National. My favorite is Yoho, and I really must get back there soon.
This looks challenging but gorgeous!!
Option 1 is a delightful hike and is not challenging at all. Hundreds of tourists make it up there annually. Beyond that – you are 100% correct! It’s a challenge for sure.
What a beautiful and rugged hike! I love the water fall.
Yes! It was so nice to cool off on such a hot day.
🙂
Rugged terrain. Who was Stanley?
Good question! I rarely look up the naming of mountains in Canada, because quite often they are named after some Professor of Obscure Subject back in the UK who has never set foot in Canada, never mind climbed a mountain. However, this one is slightly different.
The mountain was named in 1901 by first ascent climber Edward Whymper, who named the peak across the valley after himself. Whymper named this peak after Frederick Stanley, also known as Lord Stanley, who was a Governor General (the Queen’s representative) of Canada. For hockey lovers though, we know him better as the man who donated the silver dish we call the Stanley Cup.
Thanks for Another Great Question from Another Blogger 🙂
Beautiful. 🙂 … not being very able-bodied, I did a guided tour of the Athabasca glacier some years back. It was a glorious experience, being able to stand on something that old, even for just a few short moments, but also sad. They are dying, one by one. 😦
What a great experience for you. I am so happy you got to spend some time on the Athabasca. It is very sad how fast they are retreating. They have sign posts with years on the walk to the base of the glacier. I first visited when I was 19 years old. When I went back with my kids, I stood by the 1988 sign post, and the glacier was WAY far back. Sigh…
It’s a good thing you had such an early start to the day since your Plan A and B didn’t work out. Stanley Glacier looks like a great area to hike with different options depending on whether you want an additional challenge. The waterfall and headwall look beautiful and the views from the Stanley Creek Lookout look incredible. I can totally see why you posted a video as a picture wouldn’t have done these views any justice! Take care. Linda
Thank you so much! I love to see the views and terrain from someone else’s eyes. It can become a bit mundane to me, which I never want it to be. Thanks for the perspective.
What great place to hike..
Yes, it is a beautiful part of Canada. It’s amazing how different it is just on the other side of the Continental Divide – so much more water and always just a bit more lush.
Hoping to go there see this area.
Are planning on travelling soon?
Wow this looks amazing!!
Thanks! It really is a spectacular spot.
Your posts definitely motivate me to go hiking. I’m just waiting on hiking weather.
No time like the present. Get on it! Life’s too short to not go hiking.
I’m tired of sweating profusely 😂 can I wait until I sweat a little?
LOL! You bet. I can’t stand being too hot.
I’ve sweated so much this summer… I want a good cold fall and winter. I’ll take snow and 20’s.
Beautiful place! Excellent photos 😊😊
Thank you. It’s a beautiful part of the world.
Yes definitely 😊😊🌹❣️